Llega la opción “arrastrar y soltar” para las tablas de Confluence
Confluence es la herramienta clave para facilitar la gestión del conocimiento en los equipos. Permite crear, compartir y colaborar en documentos en tiempo real, centralizando la información y asegurando que todos los miembros estén alineados. Escuchando nuestras necesidades como usuarios, Atlassian trabaja en la mejora constante de esta plataforma, con actualizaciones como Confluence WhiteBoards o Confluence Databases.
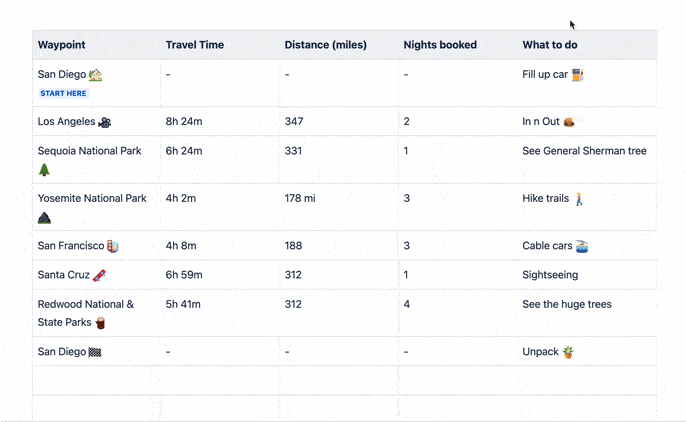
En esta ocasión, la mejora viene en una de las formas más útiles para presentar y organizar el contenido: las tablas. Atlassian ha introducido una novedad que nos permite arrastrarlas y soltarlas, facilitando así la reorganización de filas y columnas.
En este artículo veremos cómo sacar el máximo provecho de esta nueva funcionalidad, que está disponible para todas las suscripciones 👇
¿Cuáles son las nuevas características?
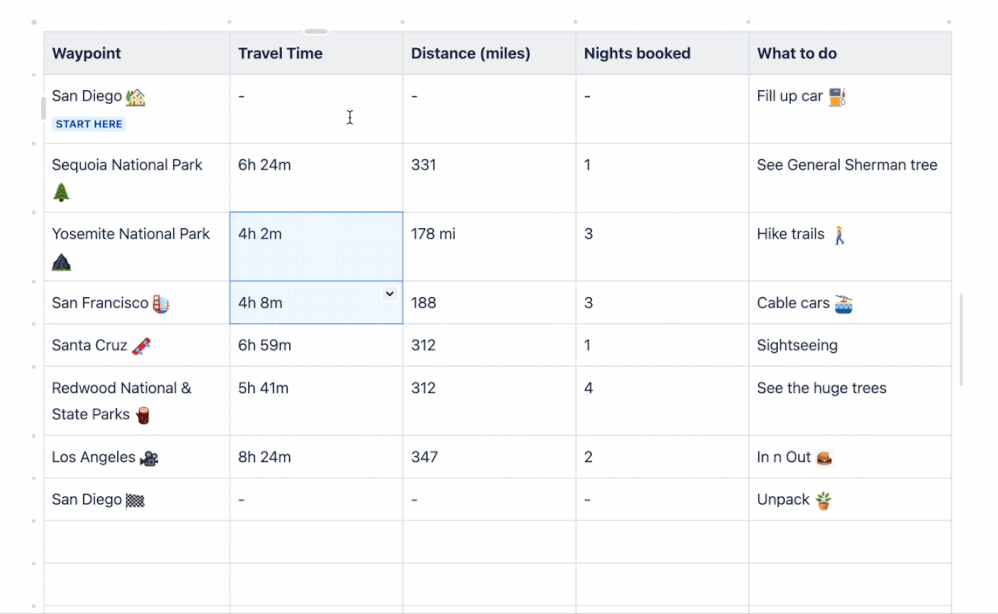
Drag and drop
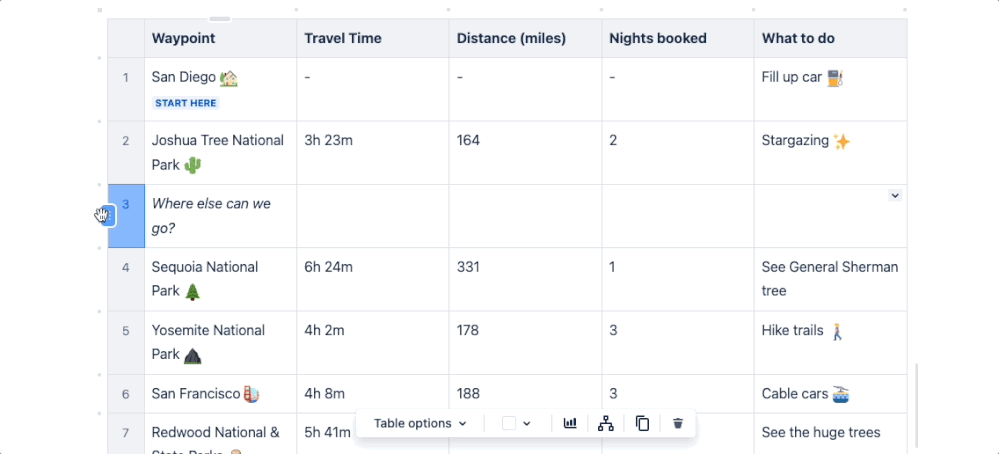
Controles de tabla

Auto-desplazamiento
Mejoras en accesibilidad
Además de todo lo anterior, ahora aparecen menús y combinaciones de teclas para navegar por el contenido y modificarlo de una manera más rápida. Puedes utilizar estos nuevos menús para interactuar con columnas y filas. Si prefieres usar tu teclado para navegar por tu contenido, también puedes realizar una variedad de acciones con combinaciones de teclas especiales directamente desde tu tabla.
Vale, pero… ¿Cómo llevo esto a la realidad?
No te preocupes, vamos a ver cómo ejecutar esta nueva funcionalidad con un ejemplo práctico paso a paso.
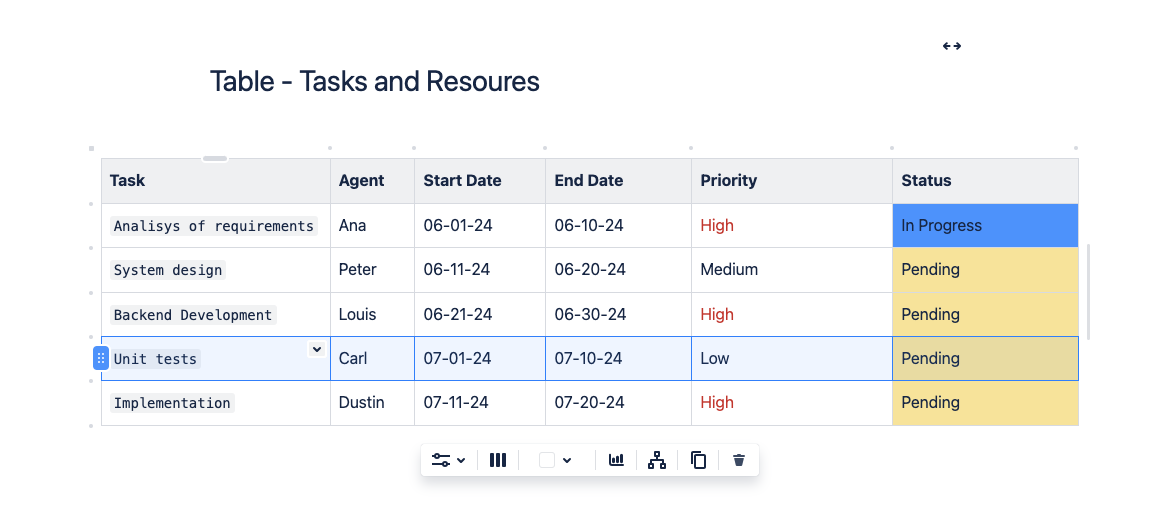
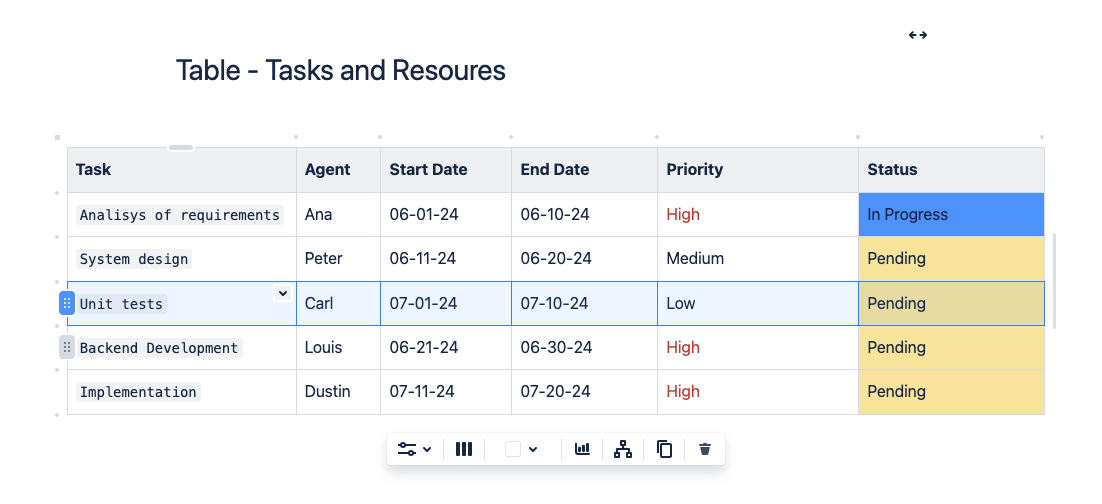
Imaginemos que estás gestionando una página en un espacio en Confluence y necesitas organizar una tabla con datos complejos sobre tareas y recursos. Supongamos que necesitas mover la tarea “Unit tests” antes de “Backend Development”.
Mover “Unit tests”:
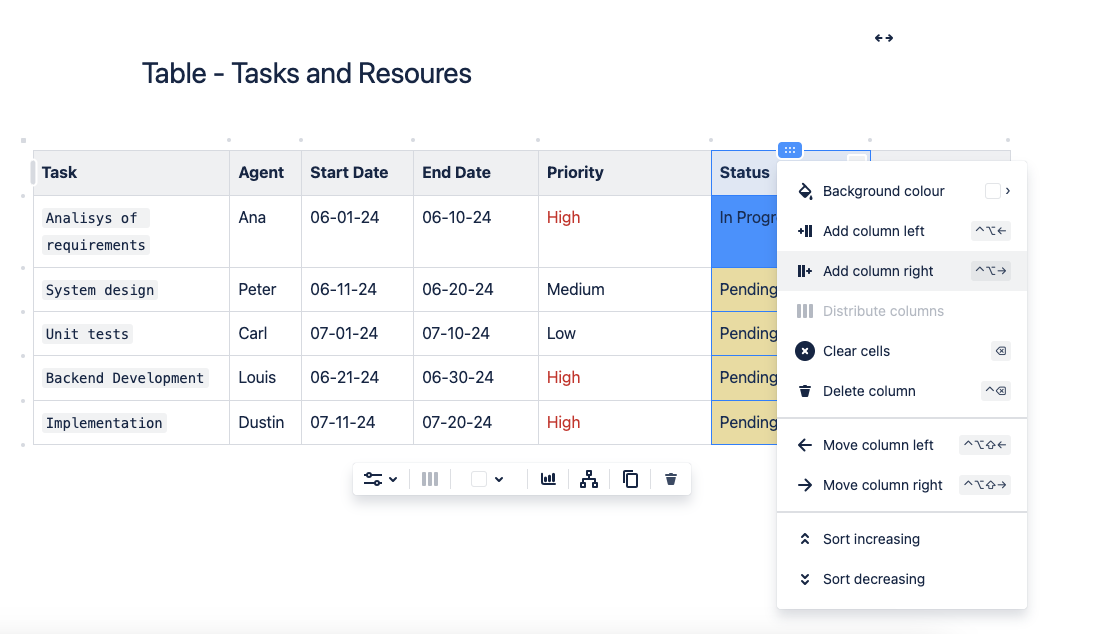
Agregar nuevas columnas y filas
Supongamos ahora que necesitas agregar una columna para el “Progreso” y una nueva fila para una tarea de “Revisión de Código”. Vamos primero con la columna:
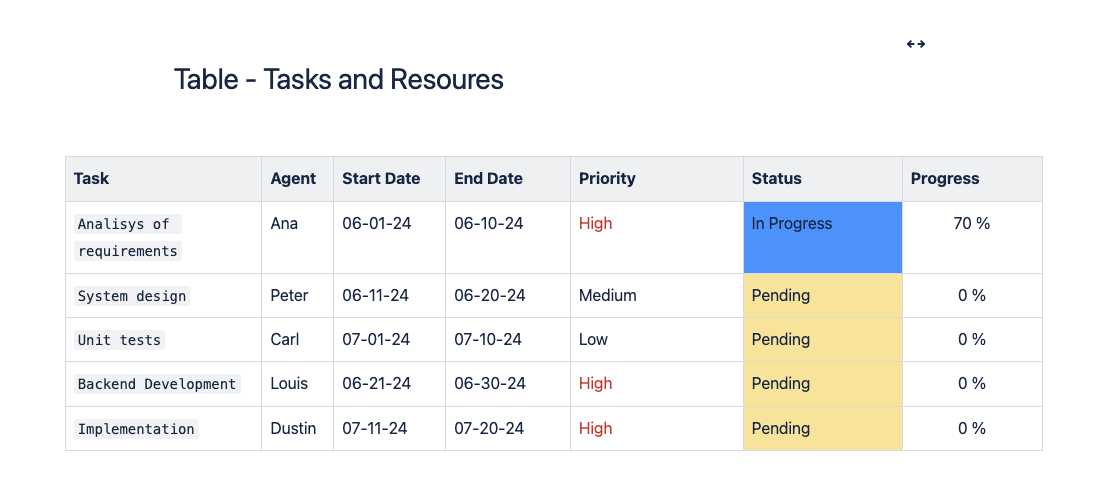
Ahora, agregaremos una nueva fila para “Revisión de código”:
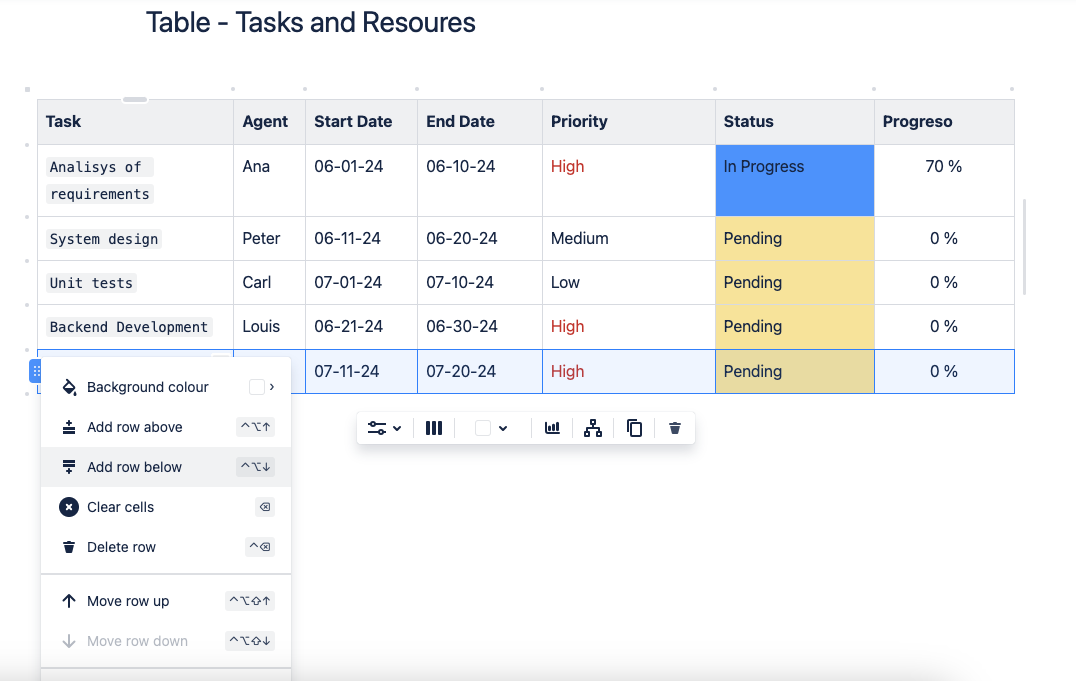
Selecciona la opción “Add row below”.
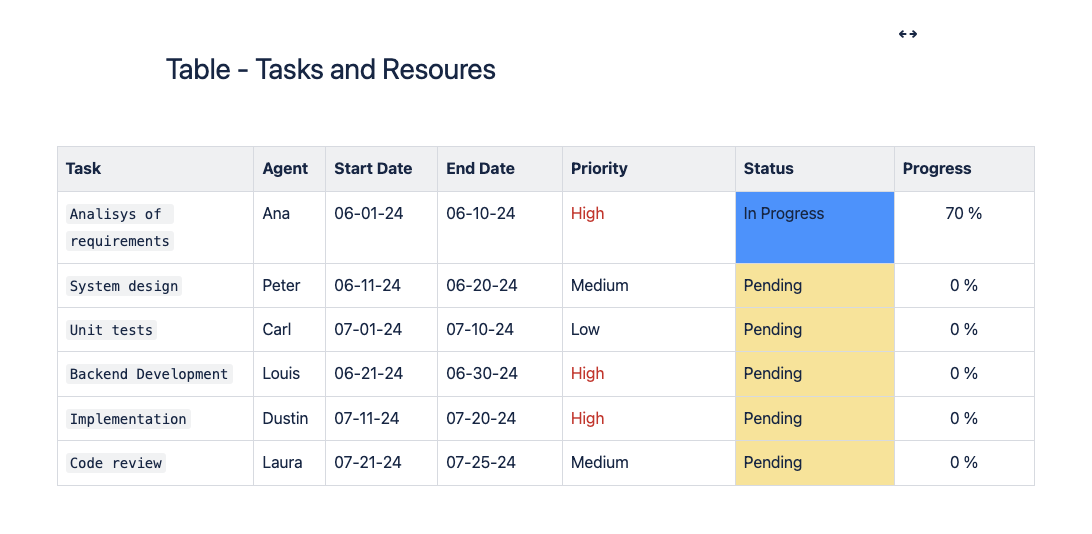
¡Y ya estaría! Este ejemplo muestra de forma clara cómo usar la funcionalidad de arrastrar y soltar para gestionar datos de un proyecto de manera eficiente en Confluence, reorganizando tareas y añadiendo nuevas filas y columnas.
Si quieres descubrir cómo sacar el máximo partido no solo a esta, sino a todas las facilidades de Confluence, ¡escríbenos! Elige el curso que más se adapte a tus necesidades y nosotras nos encargamos del resto.
![]()