Novedades en el Customer Profile de Jira Service Management
Hace solo unas semanas, analizábamos las ventajas de Jira Service Management como herramienta de gestión de servicios. Algunas de esas fortalezas son propias de la herramienta, como su flexibilidad, su sencillez de uso o su bajo tiempo de implementación. Pero, además de todo esto, los usuarios de Atlassian tenemos una ayuda extra, y es que las actualizaciones y mejoras de cada producto son constantes y muy útiles para facilitarnos el trabajo.
Hoy os hablamos de una novedad en Customer Profile para Jira Service Management 👇
Customer Profile
En Jira Service Management existen dos tipos de usuarios: los usuarios técnicos, agentes que resuelven los tickets, y los usuarios finales o clientes. Más conocidos en Atlassian como “customers“.
Dentro de un proyecto de Jira Service Management, estos “customers” tienen su propio menú. Desde aquí podemos configurar qué usuarios queremos que tengan permiso para interactuar con nuestro portal, nos abran tickets y vean las peticiones. Estos customers pueden agruparse en Organizaciones, de tal forma que la gestión sea más sencilla y podamos tomar decisiones en base a la Organización a la que pertenecen los customers. Podemos hacer, por ejemplo, que las peticiones creadas por cualquier persona de la organización sean visibles para todos los miembros de la misma.
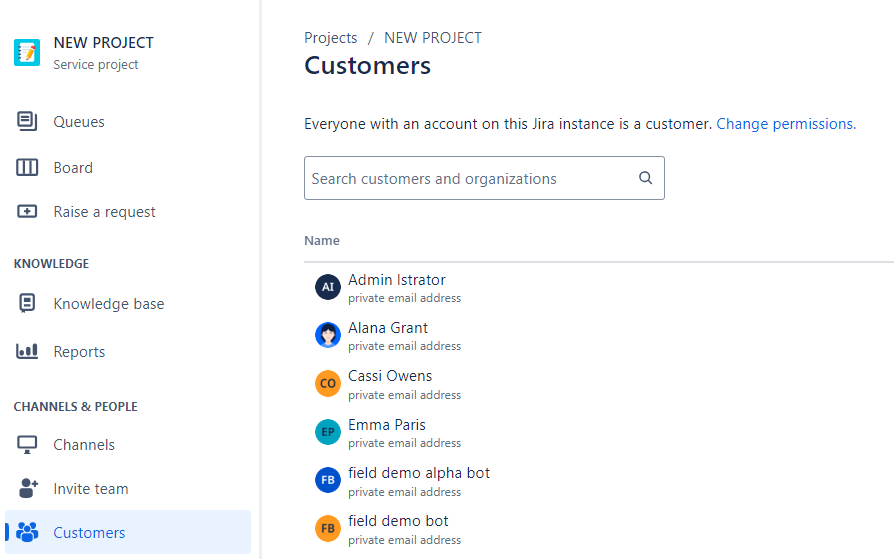 Hasta hace unos meses, en el menú “Customers” de un proyecto de Service Management, la única información que obteníamos respecto al cliente, además de la cantidad de solicitudes abiertas y cerradas, era su email.
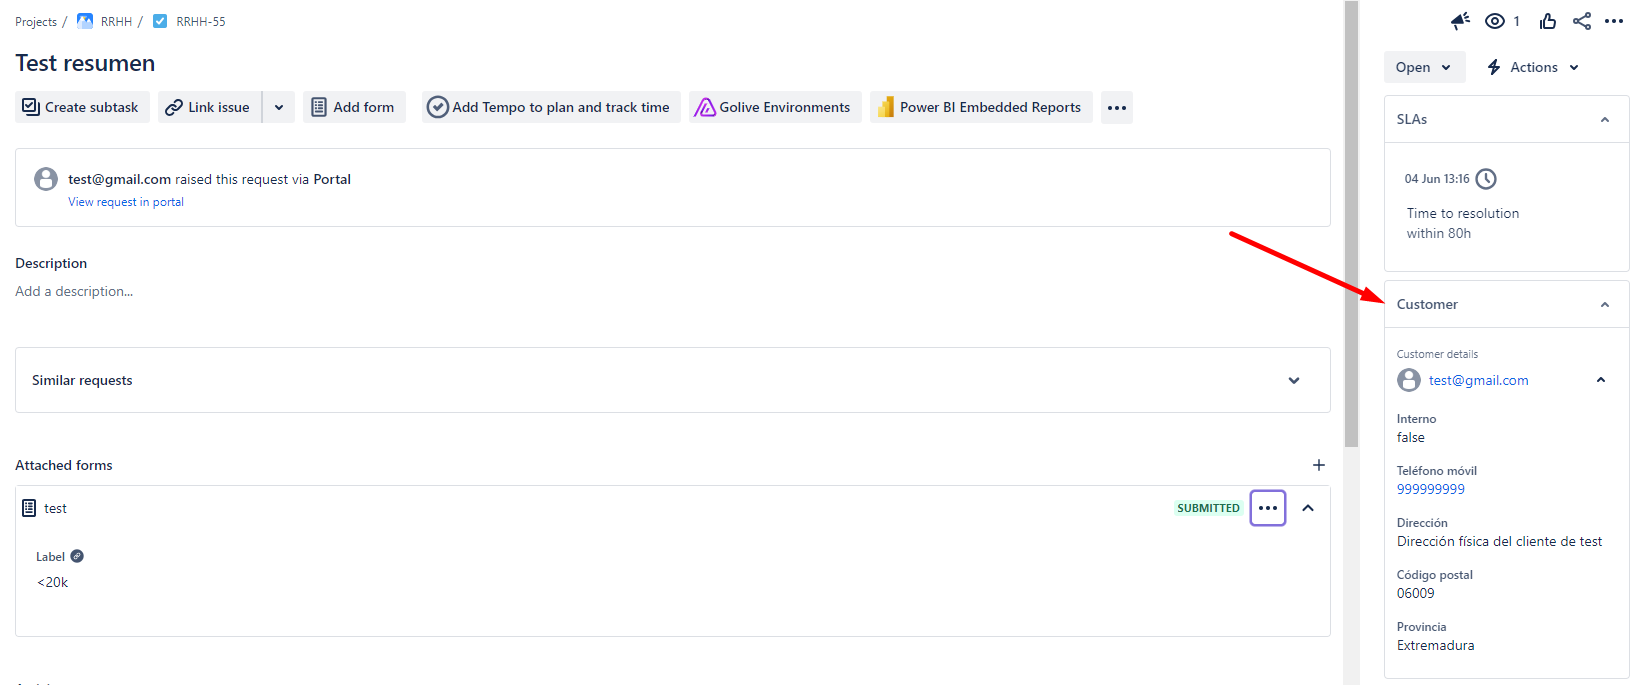
Hace muy poco, Atlassian desplegaba una nueva funcionalidad de forma nativa: creación de campos asociados a la ficha de customer u organización. Campos como por ejemplo un email alternativo, número de teléfono, dirección, código postal… para que realmente tengamos en el proyecto de Jira Service Management una foto completa de nuestros clientes. Lo mejor es que esta información también será visible directamente desde los tickets en los que estemos trabajando. Esto facilita enormemente el trabajo, ya que el agente que tenga ese ticket asignado puede ver toda la información accesible en un único espacio. Esta sería la visualización en un ticket de toda la información incluida para un customer del proyecto:
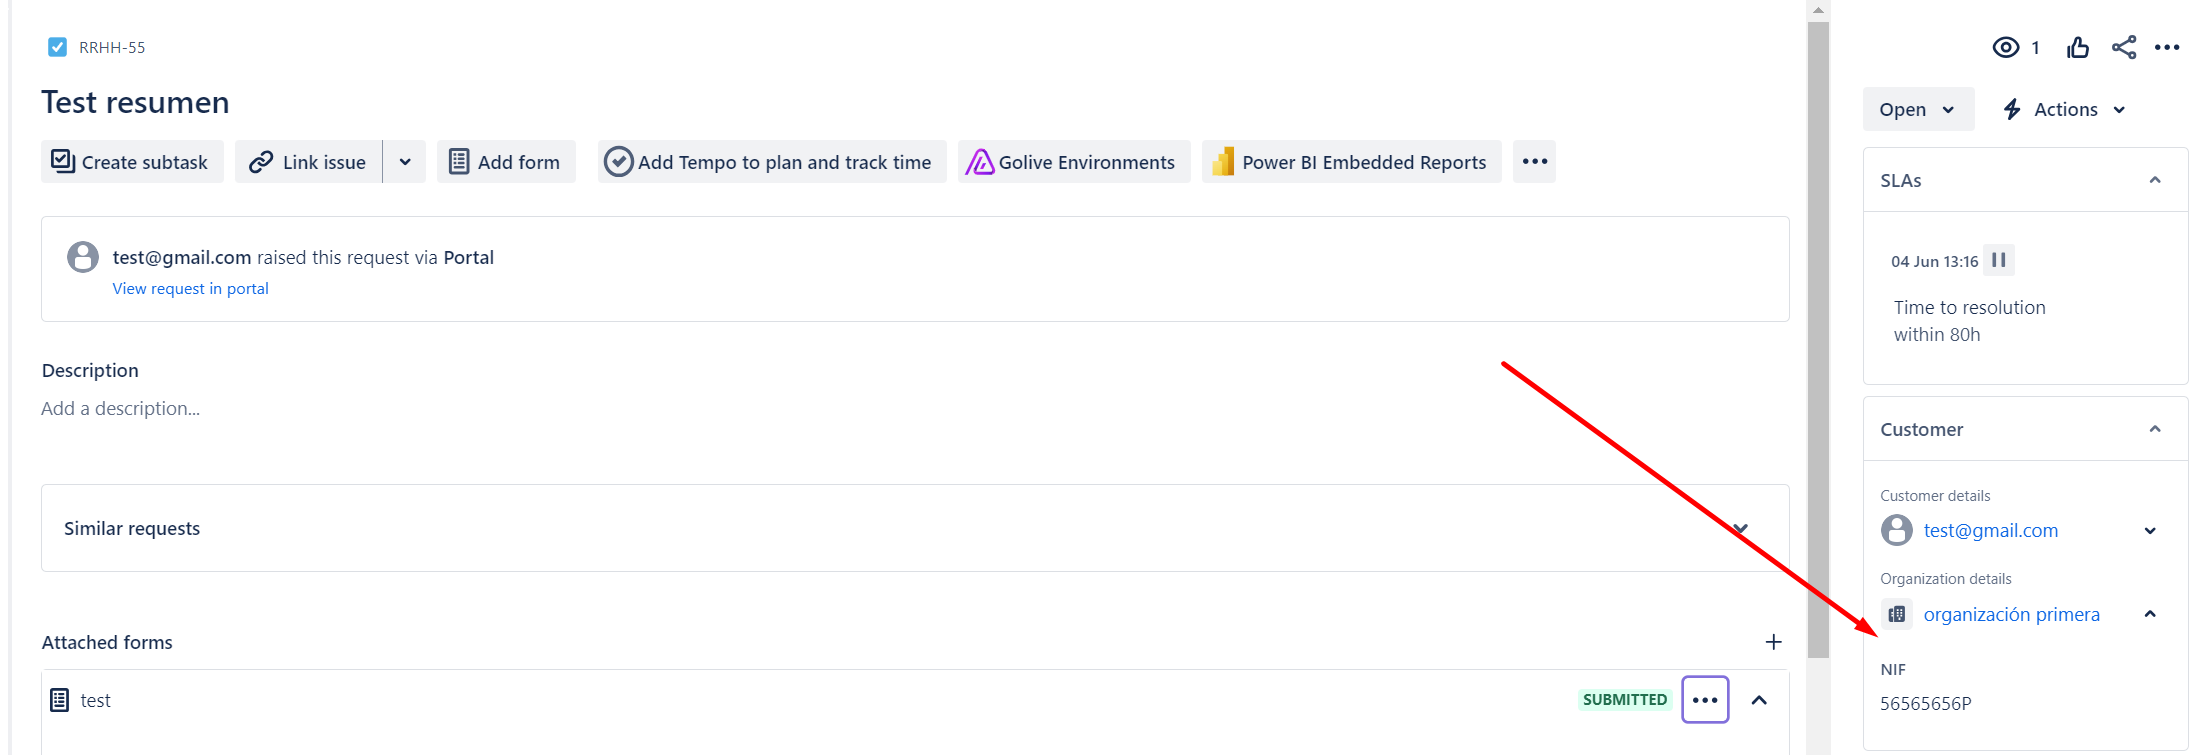
Si además hemos incluido datos de la organización, podemos llegar a verlo de esta forma:
¿Cómo activar esta función?
Para activar esta función, además de ser administrador del proyecto, deberemos seguir estos sencillos pasos:
- Accedemos a nuestro proyecto.
- Buscamos la opción “Configuración del proyecto / Project settings”
- Una vez dentro, buscamos la opción “Funciones / Features”
- Ahora que ya estamos dentro de “Funciones”, buscaremos “Perfiles de clientes y organizaciones / Customer and organization profiles” y activaremos esta opción.
- Una vez tengamos activada la nueva característica, haremos clic en “Clientes / Customers”.
Este banner nos indica que la funcionalidad ha sido activada correctamente y que ya podemos empezar a añadir datos de nuestros clientes:

Gracias a que hemos activado esta nueva función, ahora ya podemos entrar en cada uno de los Customers de nuestro proyecto y ver qué nuevas opciones tenemos disponibles. Sucede lo mismo en el caso de las organizaciones:
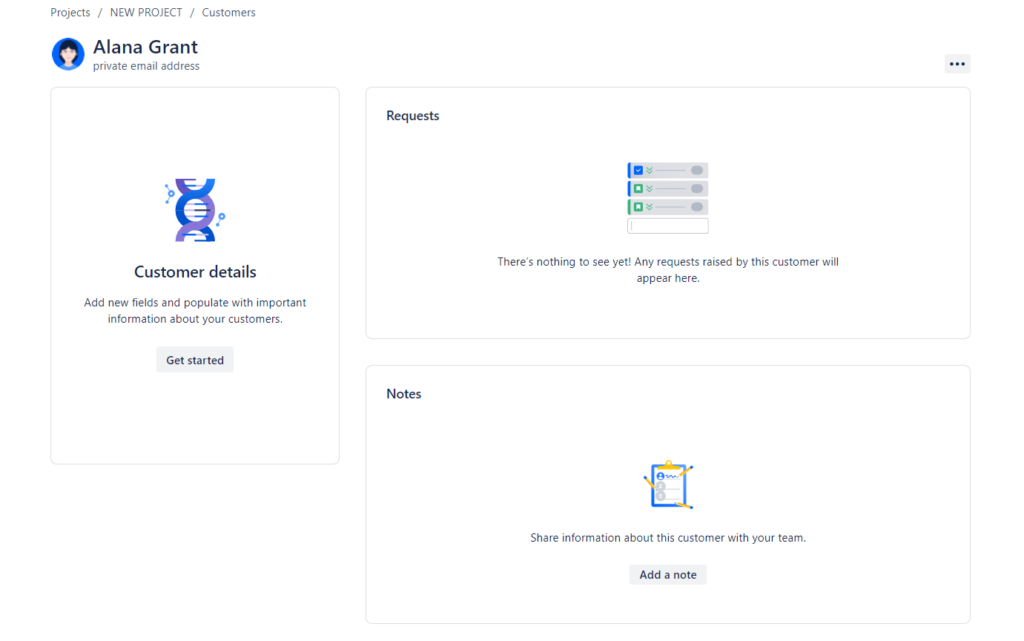
- Notes / Notas, donde podemos dejar comentarios que solo verá nuestro equipo.
- Request / Solicitudes, donde veremos las peticiones de este cliente, así como el resumen del ticket y el estado.
- Customer details / Detalles de los clientes, donde podremos visualizar los nuevos campos asociados a cada cliente. En este caso, no tenemos creado ningún campo, pero en cuanto lo tengamos creado y poblado, lo veremos en esta pantalla.
¿Cómo crear nuevos campos para el perfil de cliente?
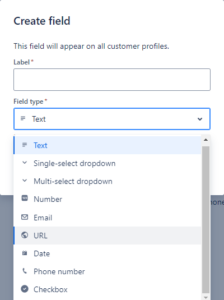
Para crear los detalles de cada cliente, tendremos que hacer clic sobre el botón “Get Started / Comenzar” y se abrirá una nueva pantalla donde podemos crear los nuevos campos: “Create field”.

 Podemos crear tantos campos como sean necesarios, pero cuidado👀, recuerda que es importante incluir solo aquella información que seas capaz de mantener actualizada y que realmente aporte valor para el proceso que estás llevando a cabo. Estos campos se podrán utilizar en cualquier proyecto de Jira Service Mangament.
Cada campo debe tener un nombre o “label” que lo identifique. Si hemos seleccionado un campo de tipo “select” tendremos además que incluir las opciones disponibles. Si tienes el rol de administración de Jira, este menú te resultará muy familiar, ya que es el que usamos a la hora de configurar los campos personalizados de la instancia.
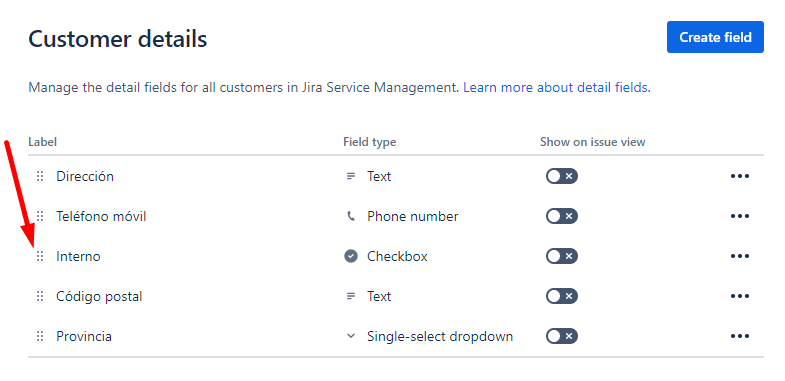
Una vez creados todos los campos necesarios, se pueden reordenar y ubicar de la forma que te resulte más cómoda:
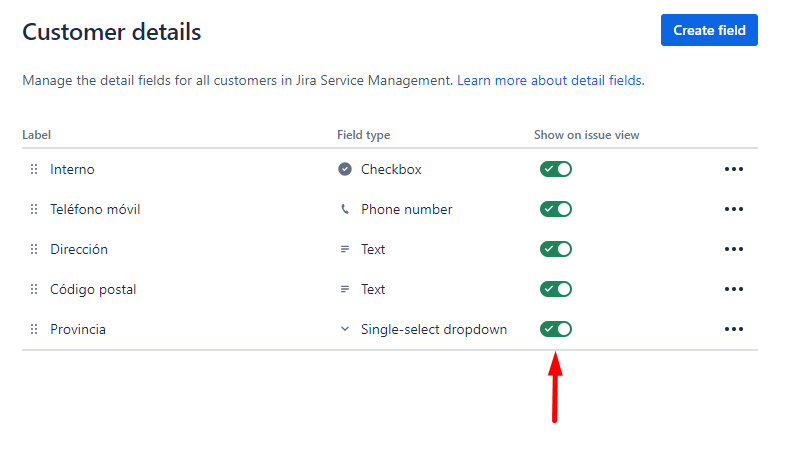
 Si además de en el propio perfil de cliente, queremos visualizar esta información también en los tickets, solo tendremos que marcar el check de “show on issue view” en cada campo.
 Si volvemos al perfil del cliente, veremos que todos los campos están ya disponibles para informarlos e incluso podemos añadir notas internas solo para nuestro equipo.
La información de los tickets creados por el cliente se informará automáticamente por Jira en cuanto haya actividad.
De esta forma, ya tendríamos un perfil cliente lo más completo posible. O al menos, con todos los campos que queramos usar para el perfil del cliente. Ahora, ¿cómo podemos actualizar toda esta información en Jira?
Importación datos de cliente
Actualmente existen dos posibilidades para importar los datos de los clientes. Se puede realizar vía API, o utilizando un CSV. Desde nuestro punto de vista esta segunda opción es más sencilla e intuitiva, simplemente tienes que seguir los pasos que detallamos a continuación.
Para este punto tenemos disponible otra funcionalidad llamada “import details“, desde el mismo menú de Customers donde nos encontrábamos.
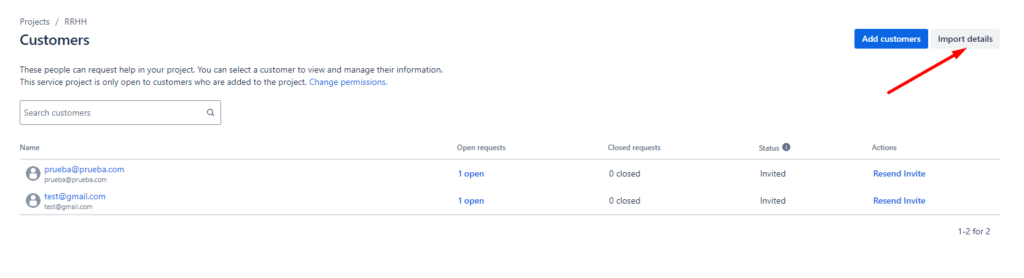
Por defecto, nos aparecerá marcada la opción de importar detalles, pero no agregar Customers. Si quisiéramos agregar nuevos customers en este mismo proceso, solo tendríamos que marcar la siguiente opción y así podemos hacer más eficiente el mecanismo de creación y actualización de datos de clientes. Este mismo proceso lo podemos hacer también para las Organizaciones.
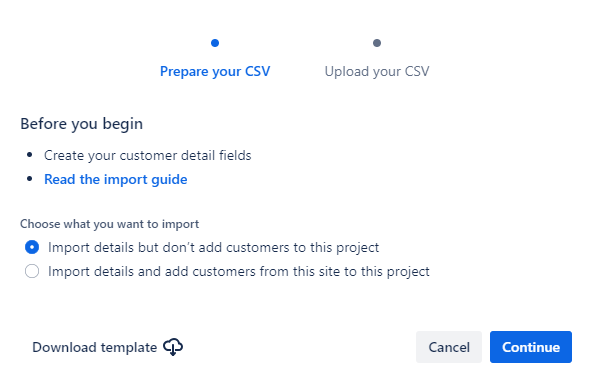
Hay un detalle muy importante❗ en este punto: Jira necesita la información en un formato adecuado. De ahí que nos de la opción de “download template” para bajar el CSV sobre el que debemos trabajar.
Esta será la plantilla que tenemos que utilizar para incluir todos los datos de nuestros clientes. Así podemos asegurarnos de que, cuando la importemos, toda la información se ubique en el sitio correcto.
Cuando la tenemos ya lista, Jira nos informará del proceso de importación y de la finalización del mismo, así como de todos los datos que se han incorporado.
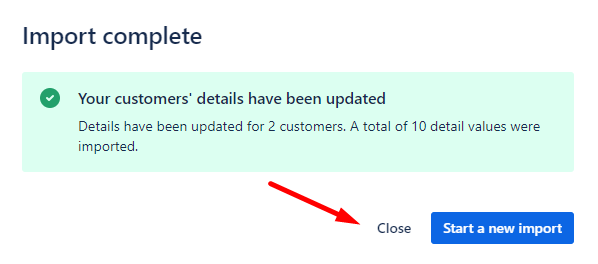
Si durante el proceso se ha identificado algún error, Jira también nos dará esa información para que podamos revisar nuestro CSV y ajustar la información si fuera necesario.
Búsqueda de datos de clientes y organizaciones
Ya que estos datos de clientes están en Jira, por supuesto podemos hacer búsquedas sobre ellos y utilizarlos en nuestros filtros. Ahora son un campo más que podemos consumir.
La sintaxis para realizar las peticiones sería customerDetail( ) y los campos soportados por ahora serían los campos de tipo usuario, como pueden ser peticionario (reporter), responsable (assignee), observadores (watcher), etc. También de momento, solo podemos utilizar los operadores “in” y “not in”.
Algunos ejemplos:
- En este primer ejemplo, mediante la siguiente JQL, Jira nos muestra los tickets del proyecto rrhh, asociados a peticionarios (Reporter), cuyo código postal sea 28123:
project = rrhh and Reporter in customerdetail("Código postal" , 28123)
- En este segundo ejemplo, la herramienta nos muestra todos los tickets del proyecto rrhh, cuyo peticionario (Reporter), no coincide con el valor de la provincia Madrid, en los detalles del cliente:
project = rrhh and Reporter not in customerdetail("Provincia" , Madrid)
La sintaxis para realizar las peticiones referentes a organizaciones sería organizationDetail( ) y el único campo soportado sería “Organizations”. Sus únicos operadores serían “in” y “not in”.
- En este ejemplo estamos solicitando todos los tickets que hayan sido compartidos con la organización que contenga el número de NIF 56565656P.
organizations in organizationDetail("NIF", "56565656P")
No podemos terminar sin recordar que, al poder realizar búsquedas con estos valores, y consultas JQL, podemos introducir estas queries en cualquier parte de la configuración del proyecto, como por ejemplo:
- Colas del proyecto de Jira Service Management
- Configuración de los SLAs en base a estos criterios
- Tableros o Dashboards con información gráfica del servicio
Si quieres saber cómo sacar el máximo partido a Jira Service Management, ¡escríbenos!