Different uses for Cloud backup and restore in Jira
Creating a Jira backup can be a great lifesaver in the face of any disaster, but it can also be of great help to:
- Keeping backups up to date in the face of a major change process.
- Restore data at any time.
- Recovering data.
- Migrate to Jira Data Center or Jira Server.
- Keep test or development instances up to date.
These are the most important points to keep in mind:
- The backups only contain the data of the Jira instance. They do not include addons or third-party applications. For this we should contact the manufacturers of each one and manage these backups separately.
- If we try to restore a backup of an instance with more users than the target instance, we will get a maximum license error and it will not be restored, so we must take this point into account, especially in test or development instances.
Create a backup from Jira Cloud:
We can create a backup of our Jira Cloud instance, from any of the existing products: Jira Software, Jira Service Management, Jira Work Management, or all of them.
We can create a backup for Cloud, or a backup for Server. The process would not be exactly the same.
In the backups we can export the following data from our Jira Cloud:
- Issues (Tickets).
- Users, groups and configurations of both.
- If you check the checkbox we can also export in our backups: attachments, user avatars and project logos.
How to create a backup for the Cloud?
In order to create these backups in our instance we go to System and within the IMPORT AND EXPORT section we will see the backup manager section, where we will choose if we will make the backup for Cloud or Server.
To do this first decide whether we need to export the attachments or not, by checking the checkbox.

Then we launch the creation of the backup for Cloud.

Once launched we will see a bar indicating that the time may take more than 30 minutes, this will depend directly on the size of the environment:

Once finished we can download the backup in the button that will appear:

Points to bear in mind:
- Each backup launched from the backup manager overwrites the previous backup.
- Atlassian will automatically delete the backups after 14 days.
- If the backup does not contain attachments, then we can instantly launch a new backup.
- If the backup does contain attachments, we must wait 48h before launching a new backup as we will get an error if we try to launch a new backup before then:

- If we launch an export for Cloud we will not be able to launch one for Server until after 48h.
How to make a backup for Server?
To do this, first decide whether you need to export the attachments or not by checking the checkbox.

It is possible that when we take data from the Cloud, some projects may have a conflict because they are of the new generation: remember that Team Managed projects do not exist in the server environment.

In these cases we will have to move the tickets to a compatible project and then delete the project to be able to perform the export correctly.
Then we launch the creation of the backup for server.

As it is a copy for Server, Jira will launch a pop-up to know the reason for this backup that we must answer to proceed:
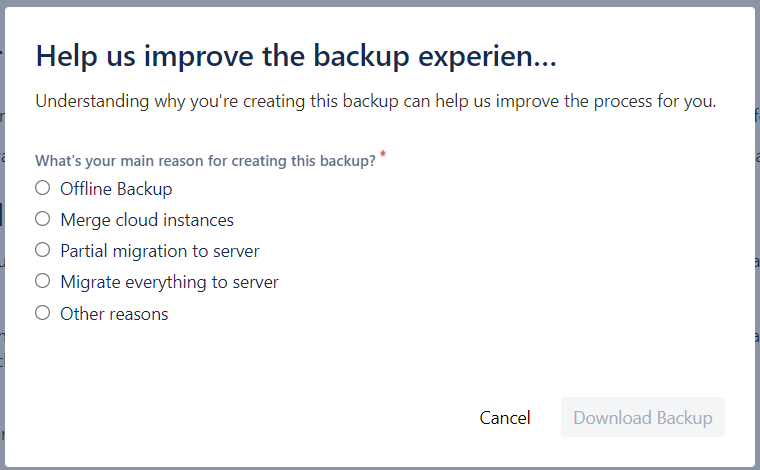
Once launched, a bar will appear indicating that the time may take more than 30 minutes, which will depend directly on the size of the environment:


Once finished, we can download the backup on the button that will appear:

Points to bear in mind:
- Each backup launched from the ‘backup manager’ overwrites the previous backup.
- Atlassian will automatically delete the backups after 14 days.
- If the backup contains no attachments, then we can instantly launch a new backup.
- If the backup contains attachments, we must wait 48h before launching a new backup because if we try it before we will get an error:

- If we launch an export for Server we will not be able to launch one for Cloud until after 48h.
Import Jira Cloud backup
To restore a backup in our instance we go to System and within the IMPORT AND EXPORT section we will go to Import Jira Cloud:
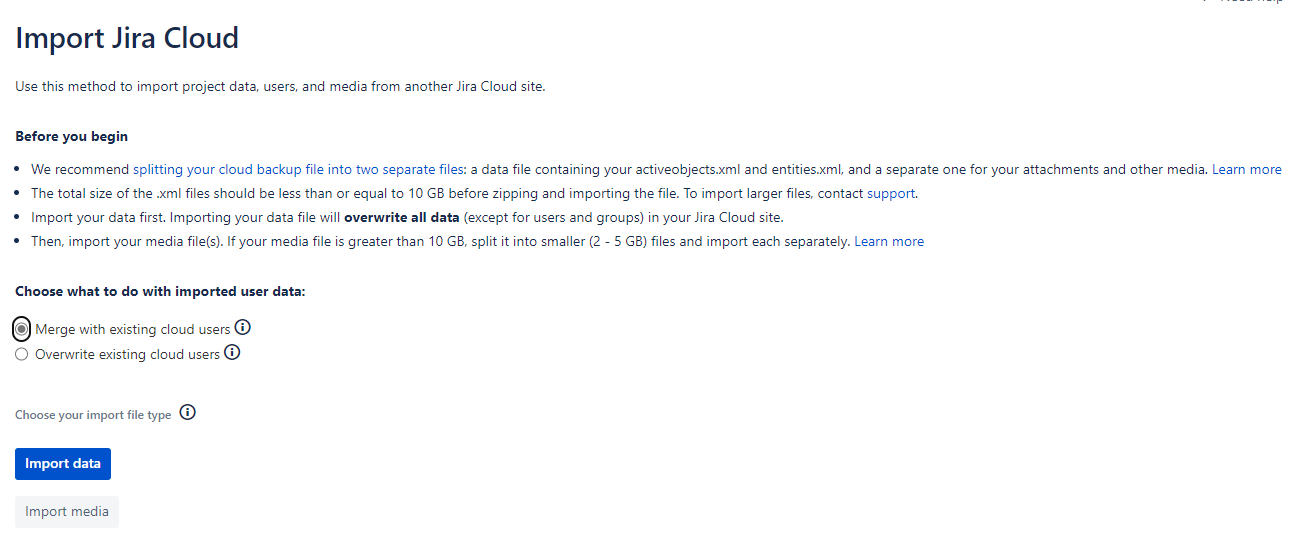
Keep in mind Atlassian’s recommendations for this process, if you want to ensure its success:
- They recommend splitting the cloud backup file into two separate files: A data file containing the active.xml and entities.xml files, and a separate file containing the attachments.
- The total size of the .xml files should be less than or equal to 10 GB before compressing and importing the archive.
- First we will import the data. Importing the data file will overwrite all data (except for users and groups) in the Jira Cloud instance.
- Once the data is imported, we import the attachments. If the attachment file is larger than 10 GB, we will split it into smaller files (2 to 5 GB) and import them one by one separately.
We will choose whether we want to combine the existing Cloud users or overwrite them with the ones in the import file.

Choose the type of file to import:
Once launched it will be processed, depending on the weight, with more or less agility:

Once imported, a screen will appear to assure us how the import has gone and to warn us that we will overwrite the current data.
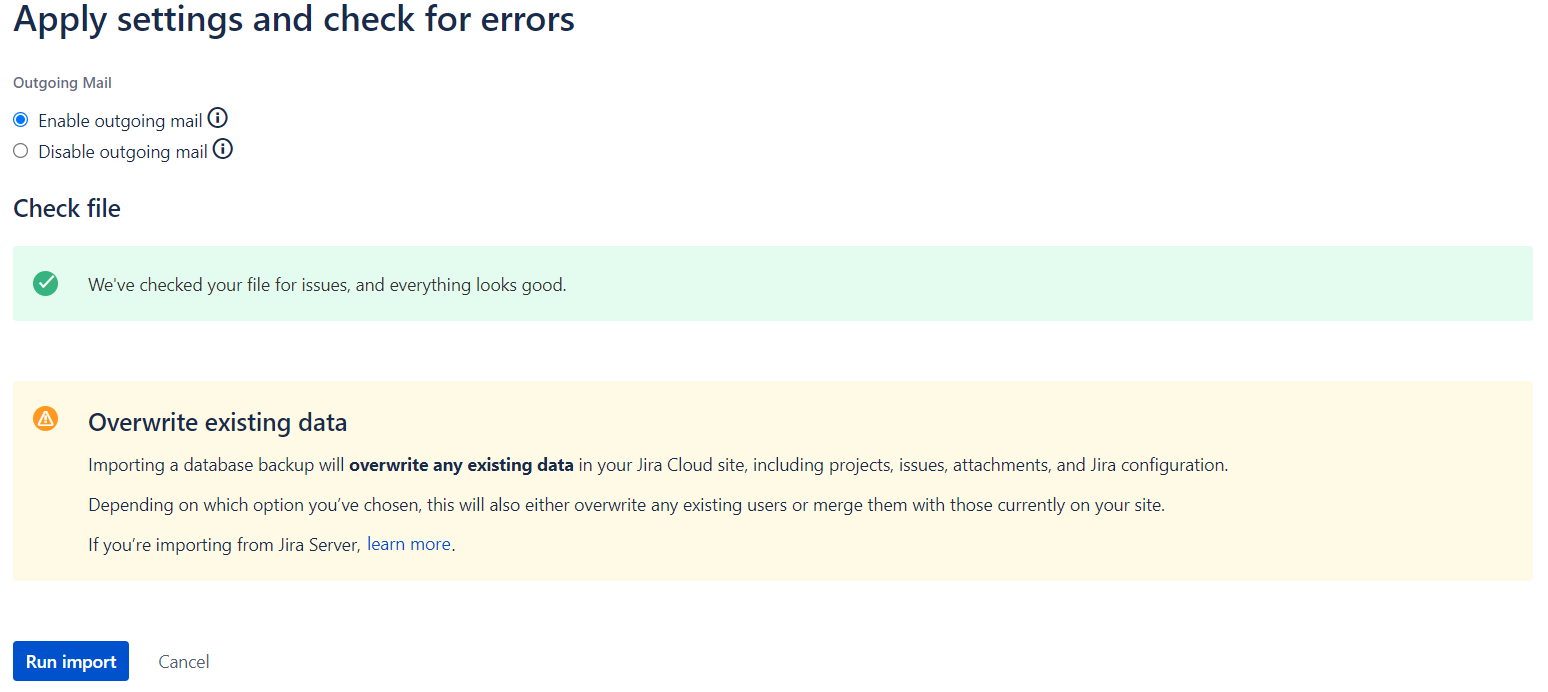
We will launch the import where we will be informed point by point about its status:
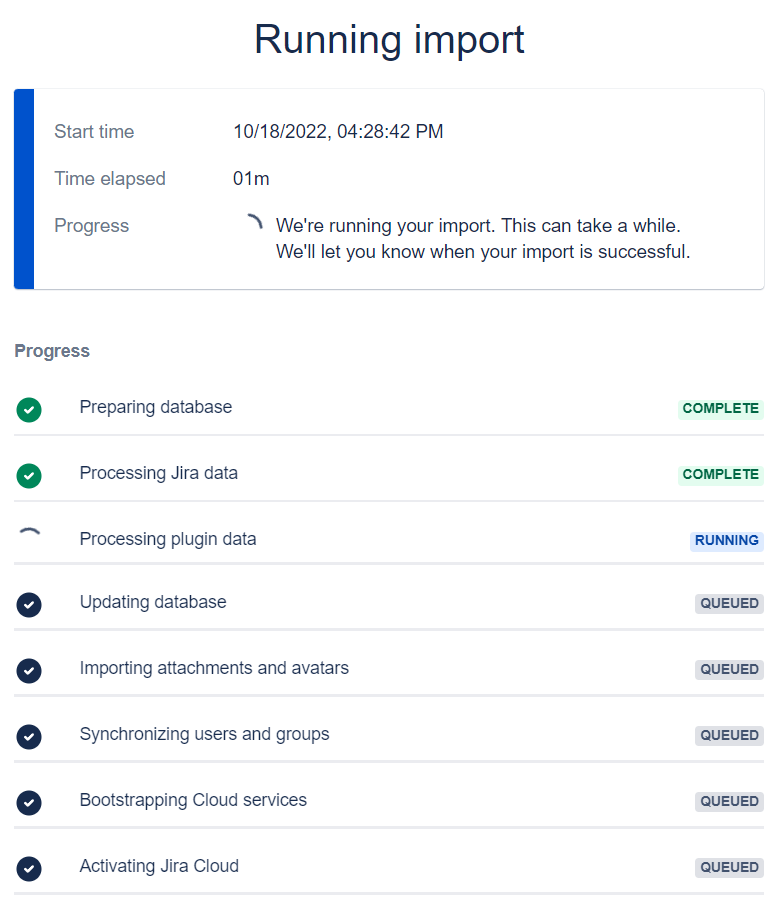
Once finished, the following screen will appear:
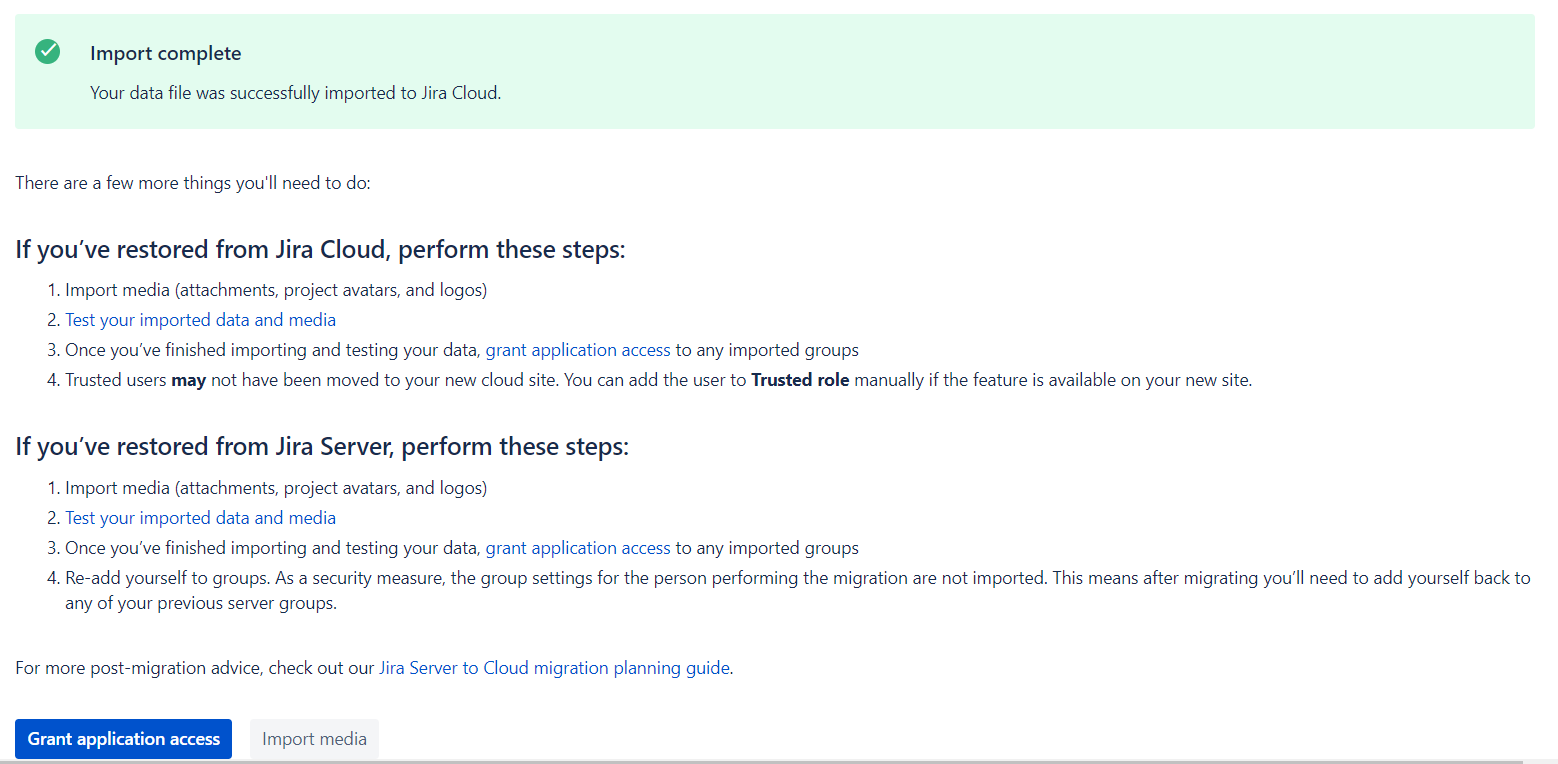
Where we can perform a series of checks and grant permissions to the groups imported to the instance.
Importing Cloud backups for Jira Server, in a Server environment
To restore a backup in our Jira Server instance we go to System and within the IMPORT AND EXPORT section we will enter Import Jira Server.
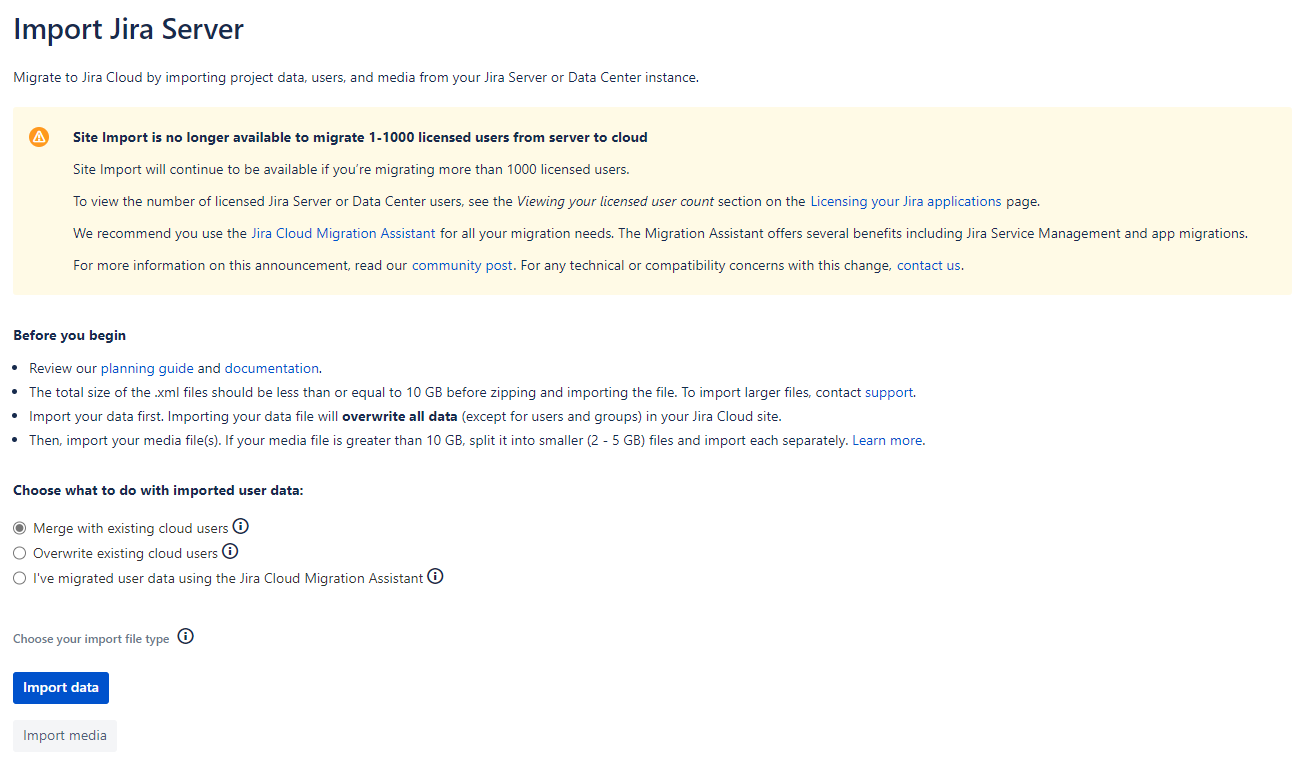
Atlassian warns us that this is only possible for instances with more than 1000 users:
That the import from Server to Cloud for less or 1000 users is not available.
For this you must use the Cloud migration wizard that you can download for free in the Atlassian Marketplace.
In case you have more than 1000 users keep in mind Atlassian’s recommendations for this process, if you want to ensure its success:
- Review their planning and documentation guide.
- The total size of the .xml files should be less than or equal to 10GB before compressing and importing the file.
- We will import the data first. Importing the data file will overwrite all data (except for users and groups) in the Jira Cloud instance.
- Once the data is imported, we import the attachments. If the attachment file is larger than 10 GB we will split it into smaller files (2 to 5 GB) and import them one by one separately.
We will choose if we want to combine the existing Cloud users, overwrite them with the ones in the import file or if we have already migrated the users using Atlassian’s migration tool.

Choose the type of file to import:
Once launched, it will be processed, depending on the weight, with more or less agility:

Once imported, we will get the screen that will assure us how the import went and warn us that we will overwrite the current data.
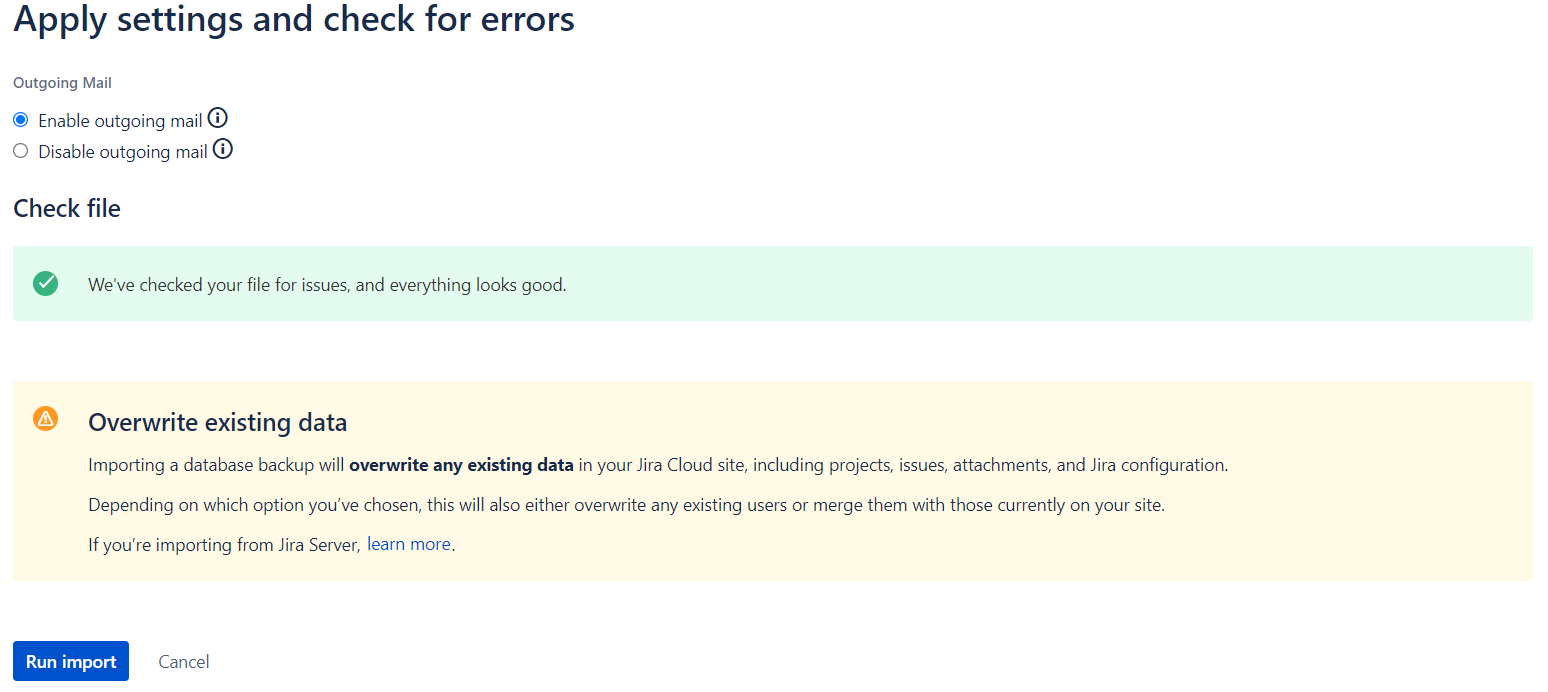
We will launch the import where we will be informed point by point of its status:
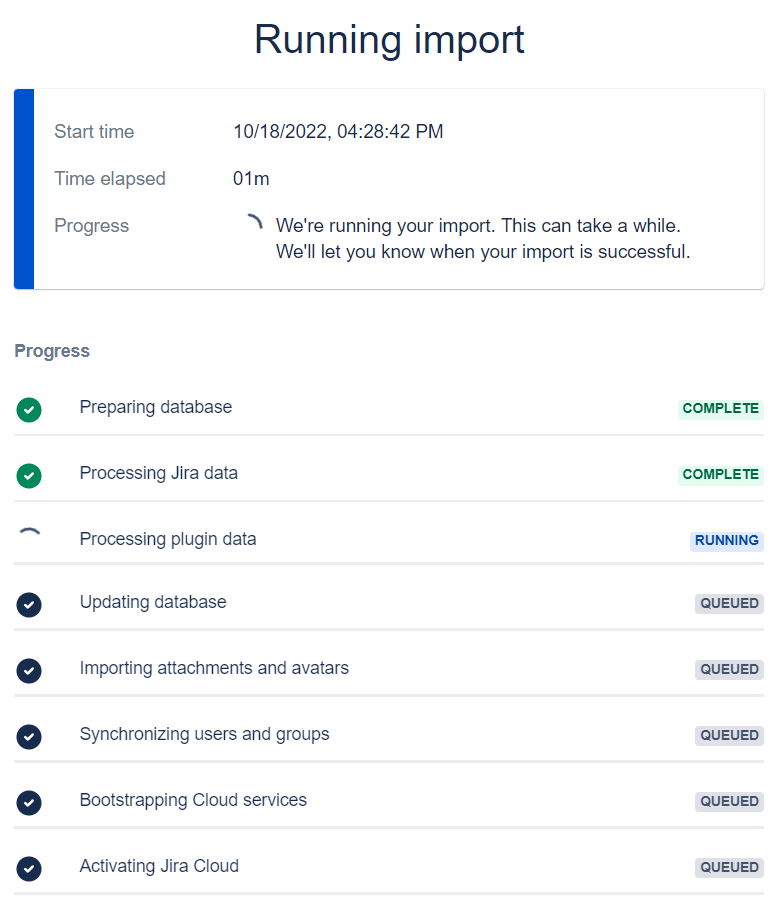
Once finished, the following screen will appear:
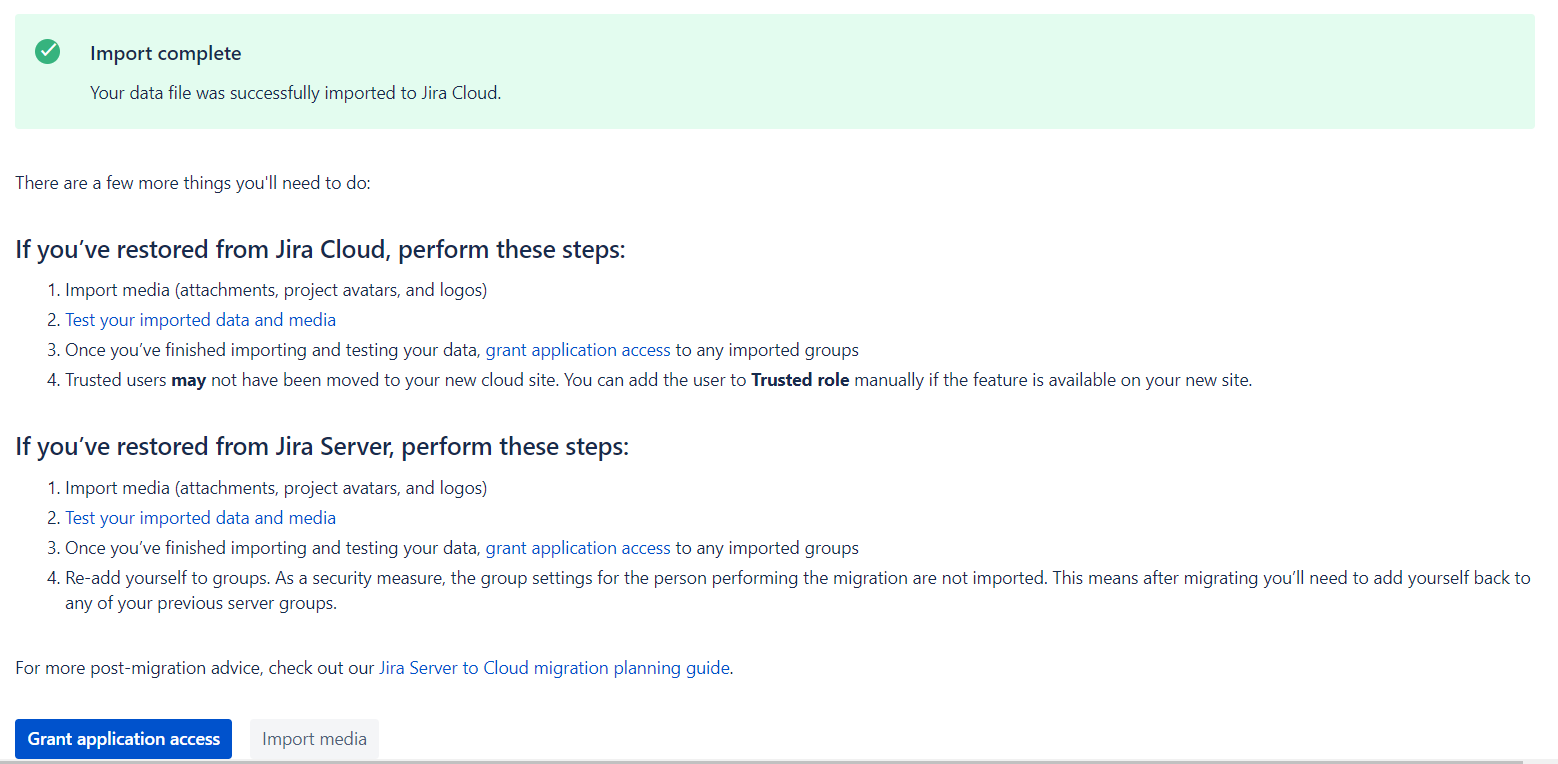
Where we can perform a series of checks and grant permissions to the groups imported to the instance.
Sam García December 13th, 2022