Build your own Rovo Agent in less than 10 minutes

![]()
In mid-October 2024, during Team 24 Europe, Atlassian officially introduced us to our new virtual teammate: Atlassian Rovo. Since that moment in Barcelona, Rovo has ceased to be the “newbie” and has become a much appreciated teammate.
If you have already been playing with Rovo’s agents, you will have seen that Atlassian itself has a multitude of proposals that you can use. From there, you can customize your own agents with the particular needs that your team has, in a simple and intuitive way.
In today’s article we bring you a very common use case and already widespread among dozens of Atlassian Cloud instances. We are going to combine Jira Service Management with Confluence. We will use Rovo to pull information from Confluence, where we have our knowledge base hosted, to help us respond to end users and customers directly in Jira Service Management. Let’s get to it! 👇
Confluence Knowledge Base
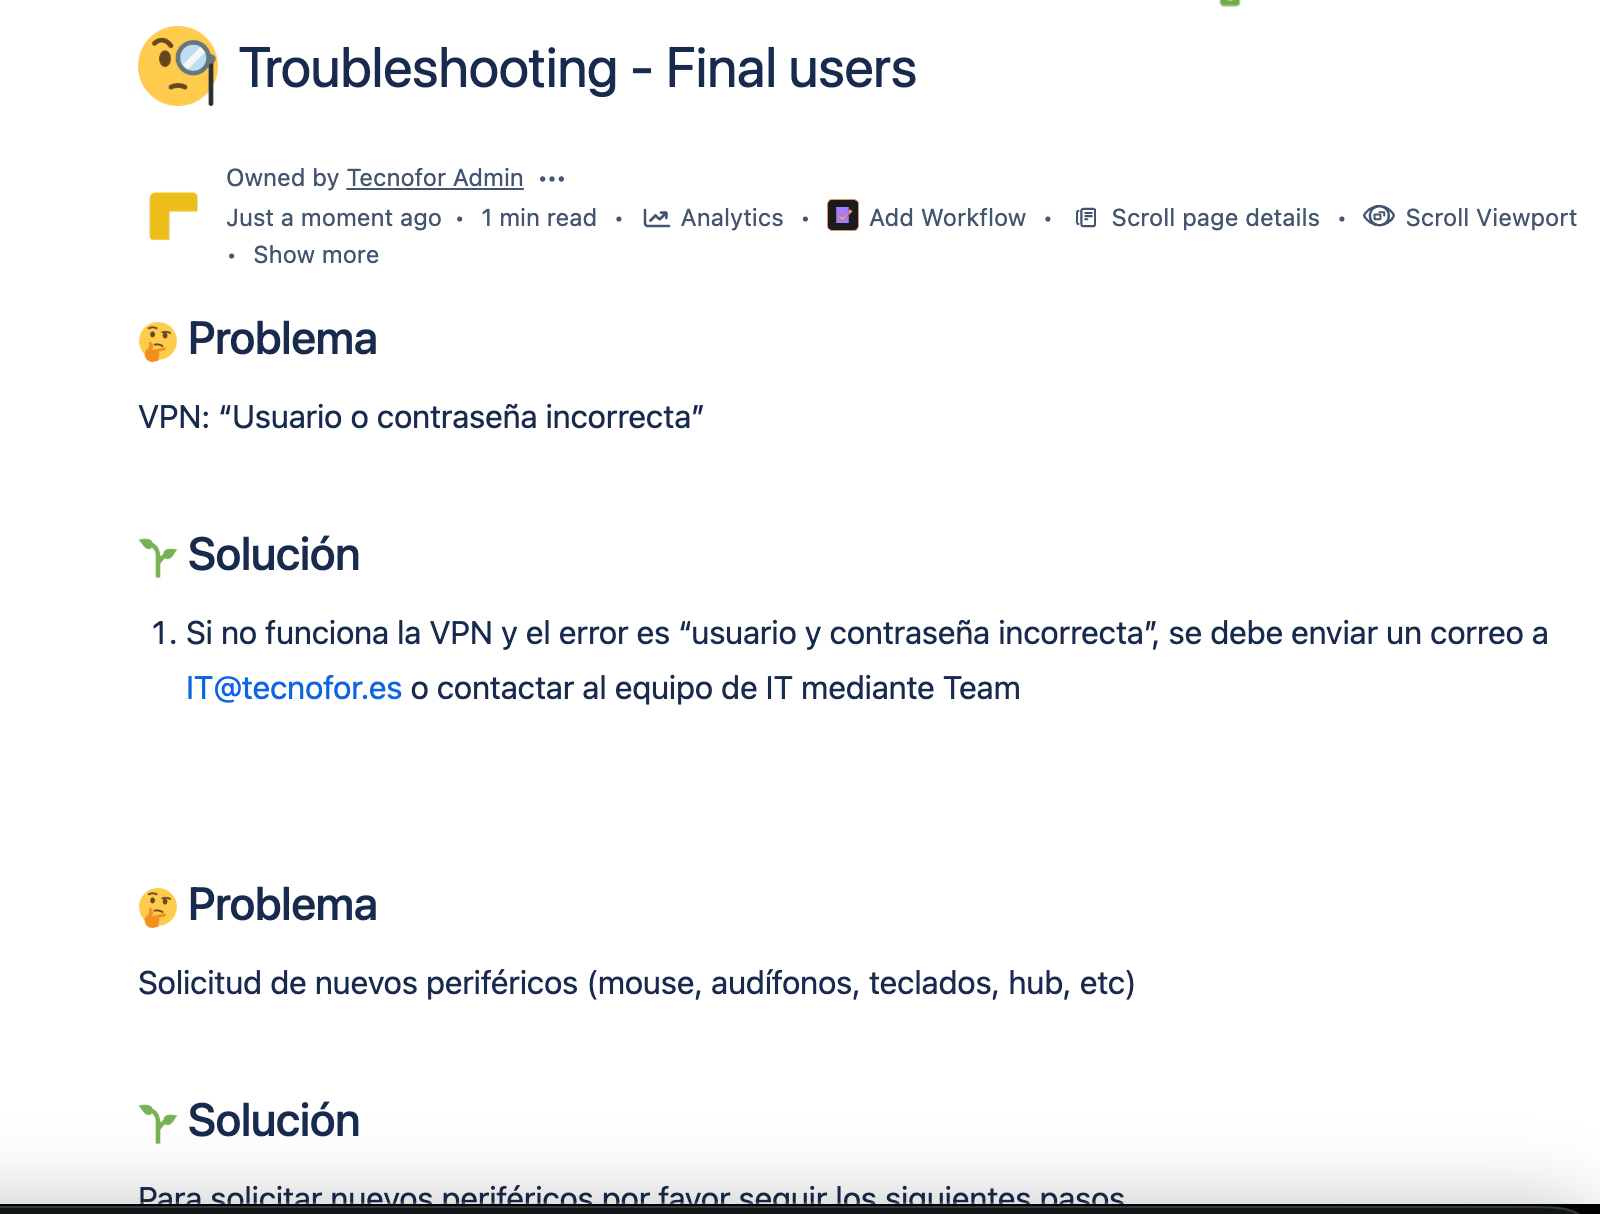
First of all, the first thing you need to do to create your own Rovo agent is to provide it with knowledge. To do this, it is essential that there are articles in the Confluence knowledge base. This way you can reference them from Jira, and Rovo will be able to find them.
Step by step to create your own Rovo agent
Once the knowledge base is configured, let’s configure our agent.
Let’s welcome “Sabelotodo” (Spanish for Smart-pants)
Our new teammate will be called “Sabelotodo”. To do this, we will use the following prompt:
Remember that, as when interacting with any Artificial Intelligence, the more specific the prompt, the more likely the result will be concrete and appropriate.
👀Another important aspect when creating the agent is to make sure that it has the appropriate permissions and scope. If it does not have any action assigned to it, it will not be able to perform it correctly. In this case, enter the comment in the corresponding ticket.
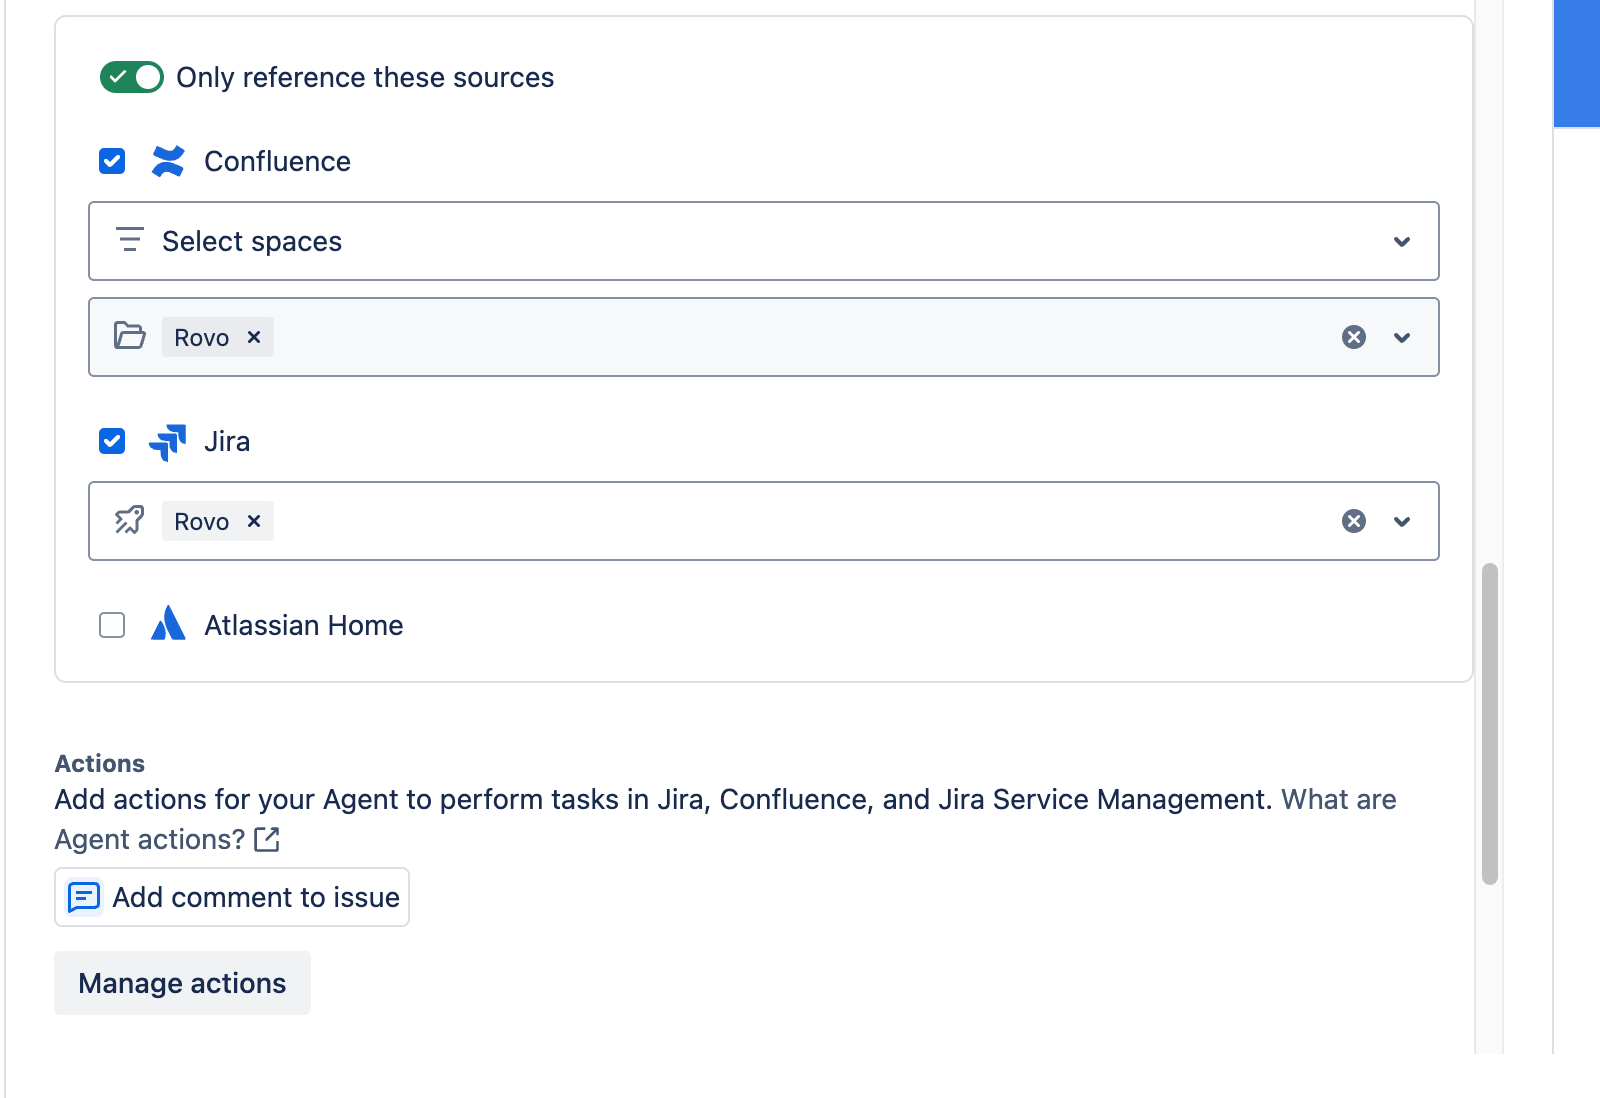
Scope
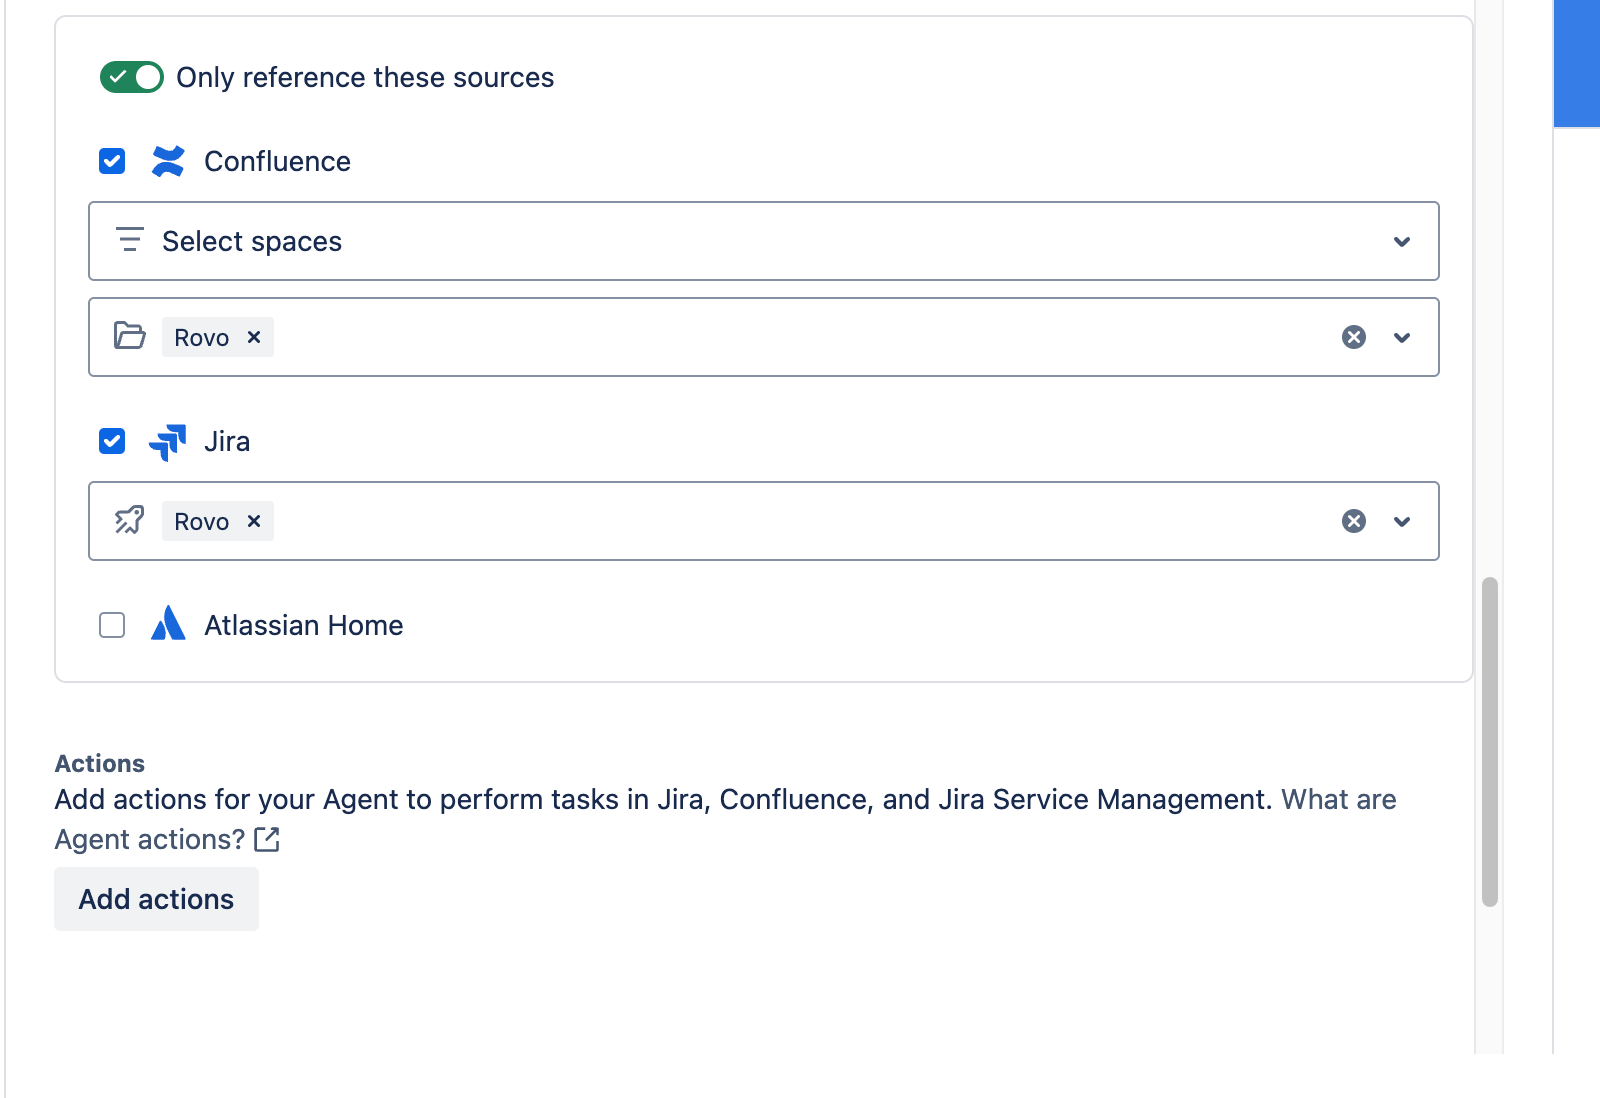
Actions
Let’s see an User Case
1. Identifying the problem
Put yourself in the following scenario: a customer has a problem with his VPN and opens the following ticket to log the incident:
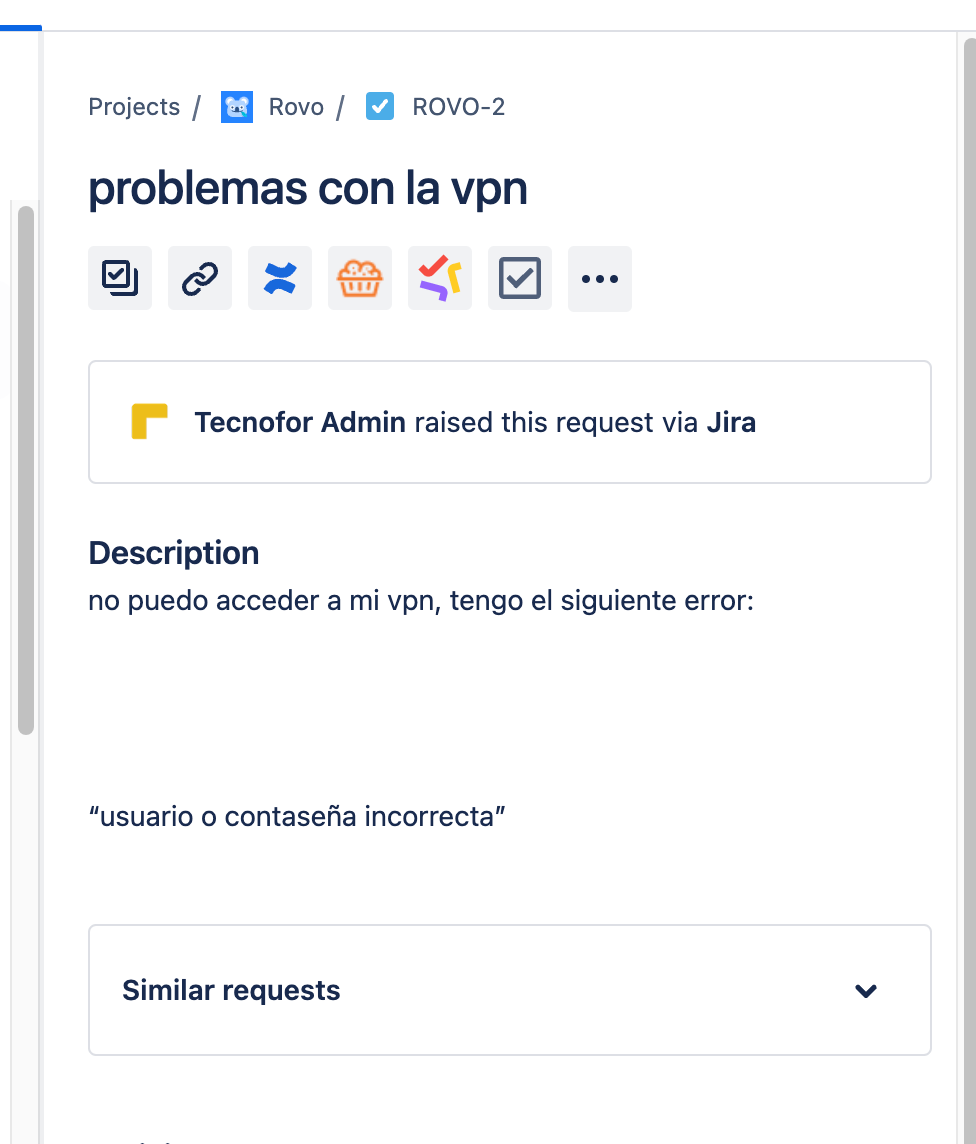
“I can’t access my VPN, I have this issue: ‘Wrong user or password’.”
2. Chat with Rovo “Sabelotodo”
To check that everything works as expected, we simply open a chat with our buddy Rovo “Sabelotodo” and ask him to generate the comment for the user.
Rovo, following the instructions, will search for the keywords and will rely on the Confluence documentation to generate a proposed response to the comment, indicating the steps to follow to solve it.
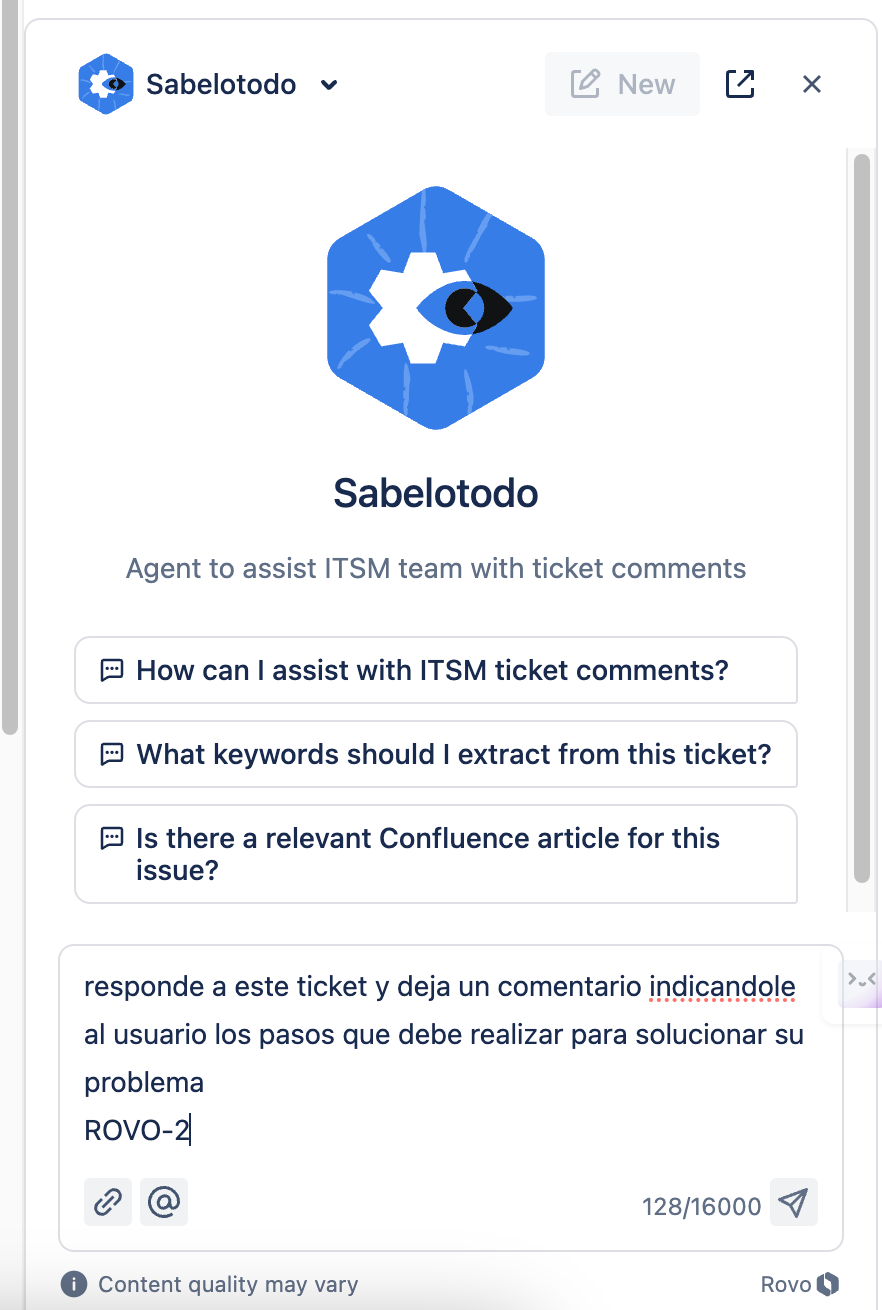
“Reply to this ticket and let a comment indicating the user which steps to follow in order to solve the problem”.
3. Confirm the answer
When you give permission or indicate that the action to be performed is “Comment on the issue”, Rovo will ask for authorization before inserting the comment:

When the confirm button is clicked, a message will appear indicating that the comment has been successfully added to the Jira ticket 👌
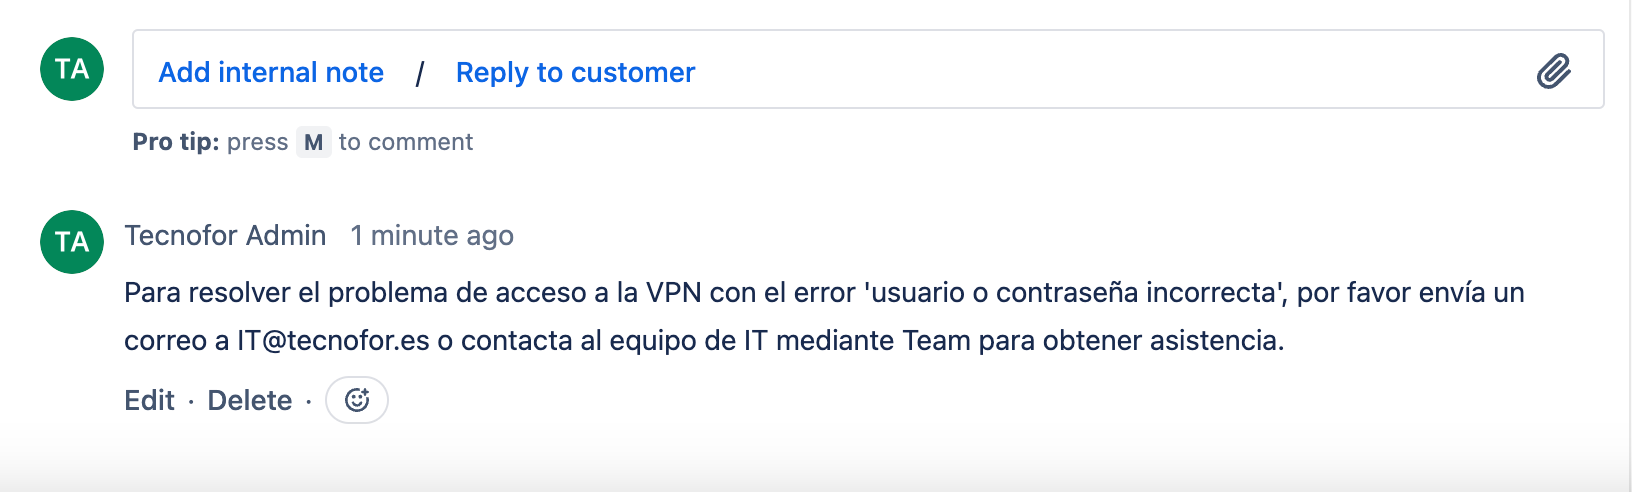
“To resolve the VPN access issue with the ‘incorrect username or password’ error, please send an email to IT@tecnofor.es or contact the IT team via Team for assistance”.
To sum up
In this article we have seen an example (among the many that exist) of how Atlassian Rovo can make our daily life easier.
Atlassian Rovo allows us to create an agent that we can create in less than 10 minutes can save us many hours of searching for information and responding to user tickets.
In short, standardizing and automating a basic task in our Jira Cloud instance not only optimizes our time, but also improves the quality of service.
If you want to incorporate this wonderful partner in your team, remember that we can help you to manage his incorporation 😉