Authentication policy for Atlassian users: what you should consider
Sometimes we need to establish authentication policies for our users, including resetting passwords every so often, for example. This policy and other authentication rules can be configured in our Atlassian Cloud instances.
Here we share a compilation of the most important points to keep in mind:
1. Domain Verification
The first requirement to be able to work with security and authentication policies is to verify the domain. Without this verification it is not possible to assign any authentication policy.

Use this article if you need to locate the policies: Understand authentication policies | Atlassian Support
This domain verification can be performed on any instance, whether or not you have already installed the Atlassian Access extension. The main difference is that if we do not have Atlassian Access, we can only set a single authentication policy for all users. However, if you have Atlassian Access you can set multiple authentication policies for each group of users you have synchronised. We will have more flexibility in setting the secure password requirements for each user group.
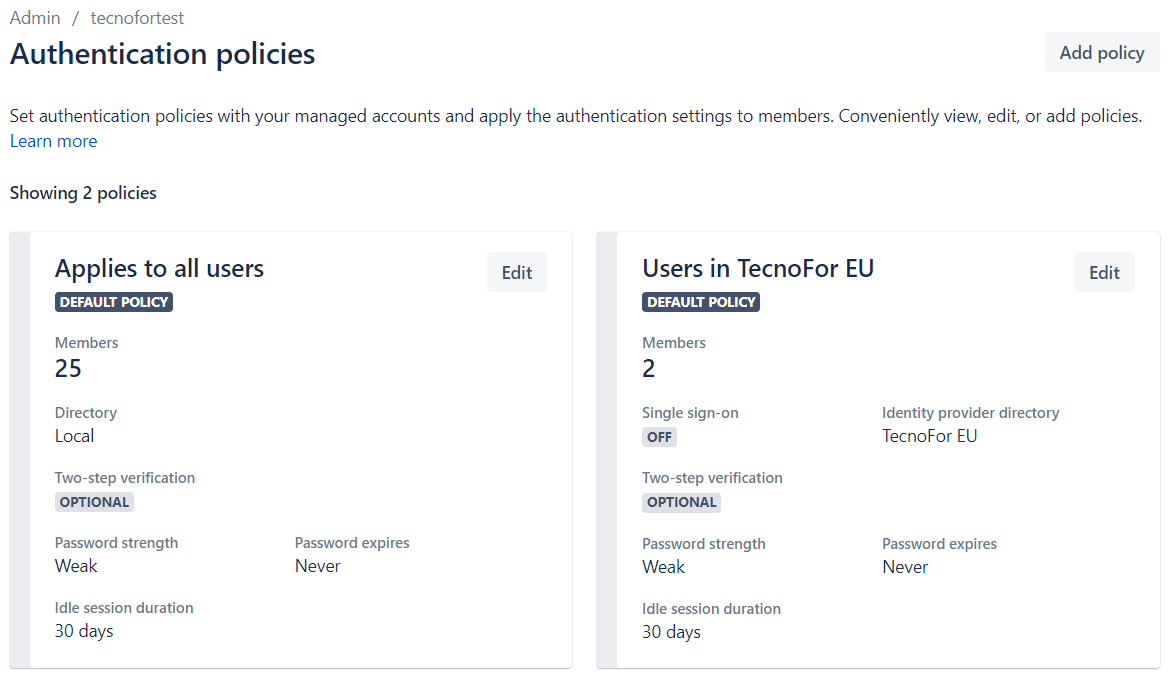
2. Policy creation
Once the domain or domains have been verified, we can add our authentication policy.

When creating the policy, we will have to decide a name for the policy. In case we have Atlassian Access, we can select the directory from all the ones we have linked.
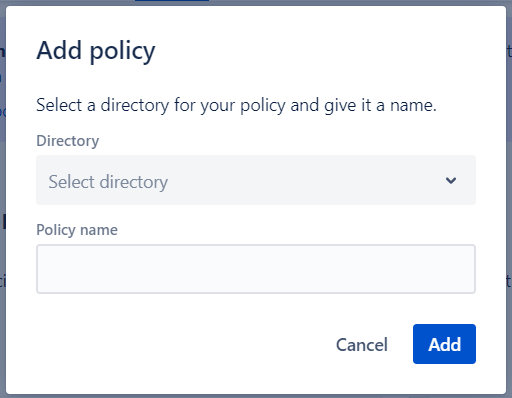
Once the policy is created, we can define the following settings:
- Two-step verification.
- Set the security level of the password and the expiry date.
- Session duration.
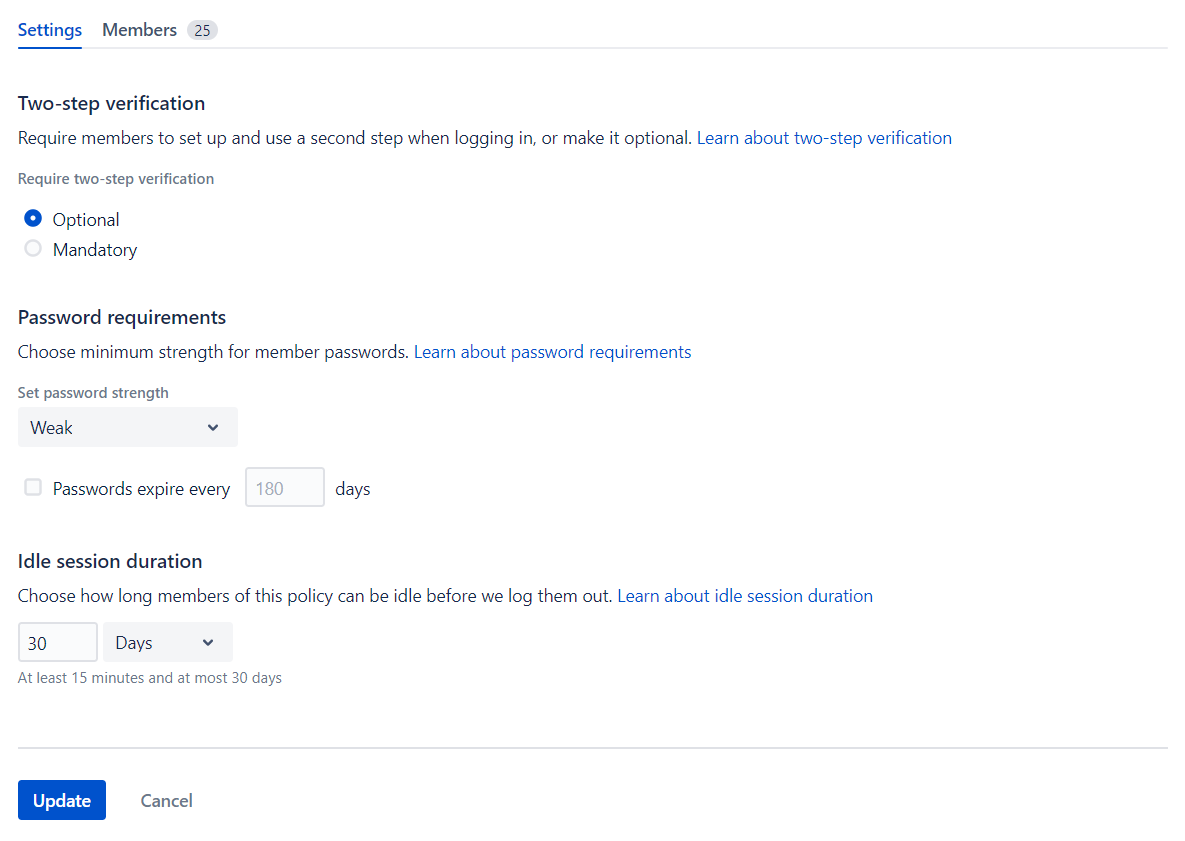
3. Set password expiry
If you have come this far and are not clear on the exact steps to take to set the password expiration, the summary is as follows:
- Go to atlassian.com. Select our organisation.
- Select Security > Authentication Policies.

3. Select Edit for the policy you want to modify.
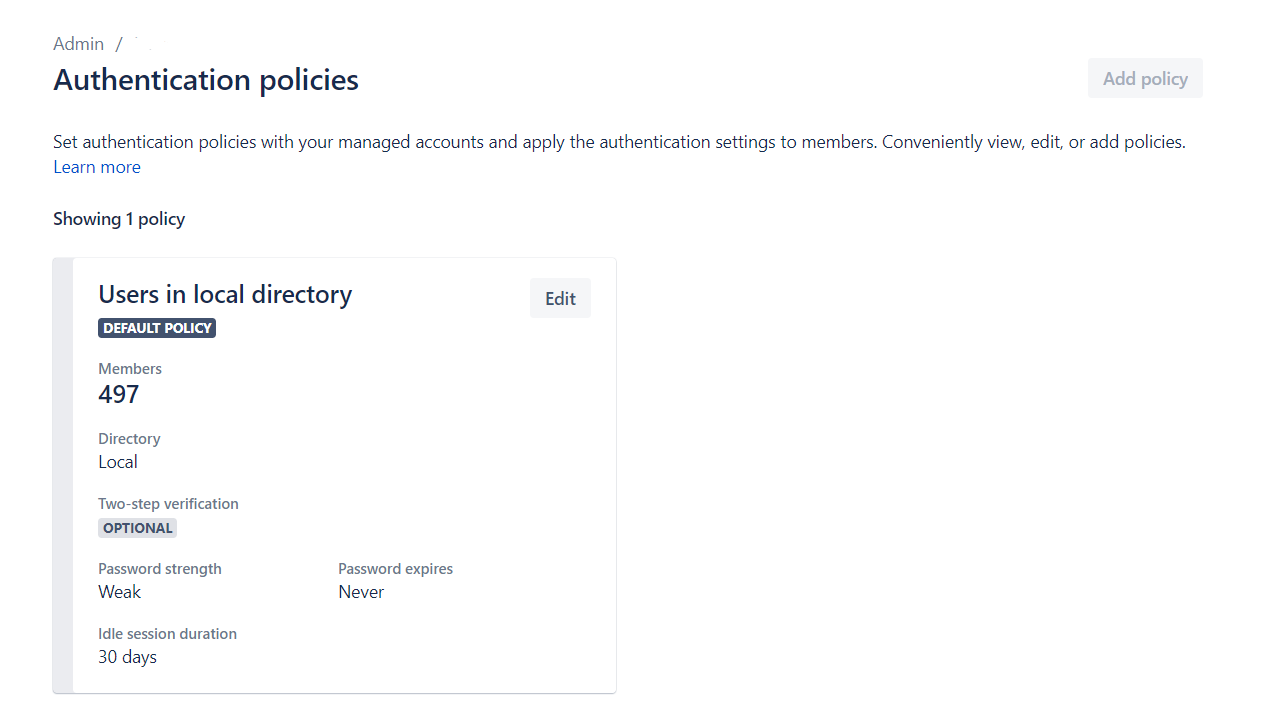
4. On the Configuration page, select Security and password expiration.
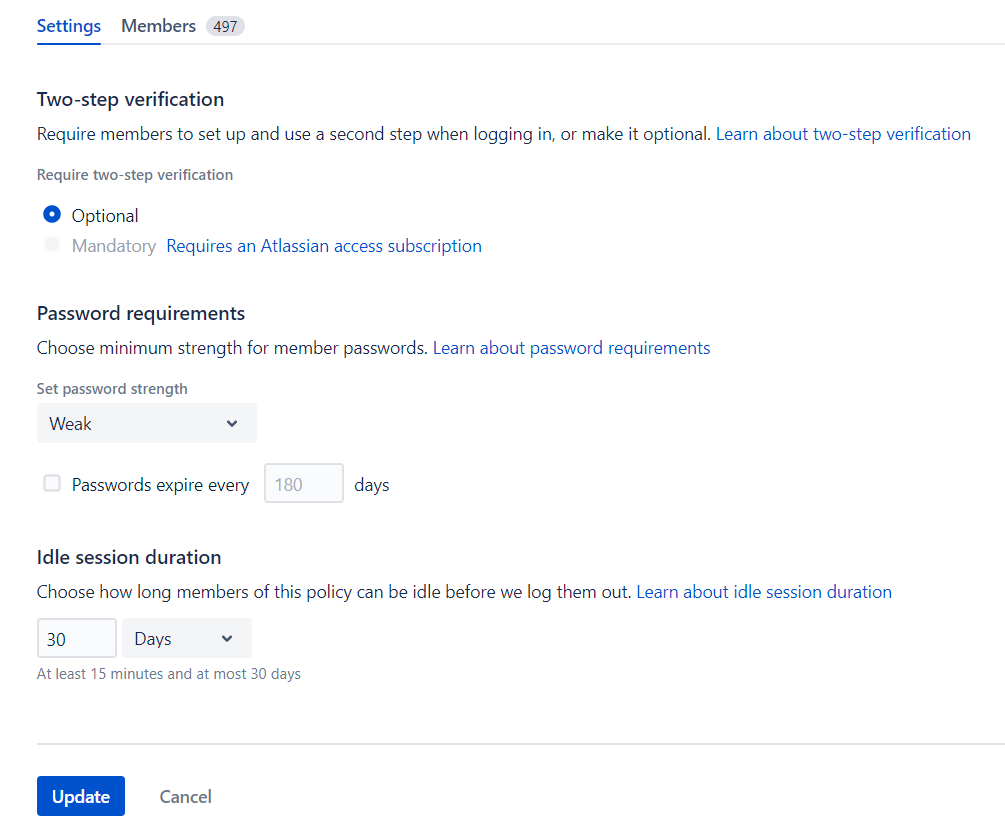
- Once you have set the period (in days) in which you want the passwords to expire, select update.
- To apply the password settings to the members immediately, we can select Reset passwords.

The next time a user logs in, we will ask them to create a new password.
4. Reset passwords
If we are interested in manually resetting all users’ passwords and making sure that when they log in they change it, then we can skip several steps and go straight to this point. If you are going to perform this masive reset, we recommend informing the users. Since logging out may take a few minutes and some of the content may be lost when they reset their password again (for example, if you were performing some action that you have not saved).
- Go to admin.atlassian.com. Select our organisation.
- Select Security > Authentication Policies.

3. Select Edit for the policy you want to modify.
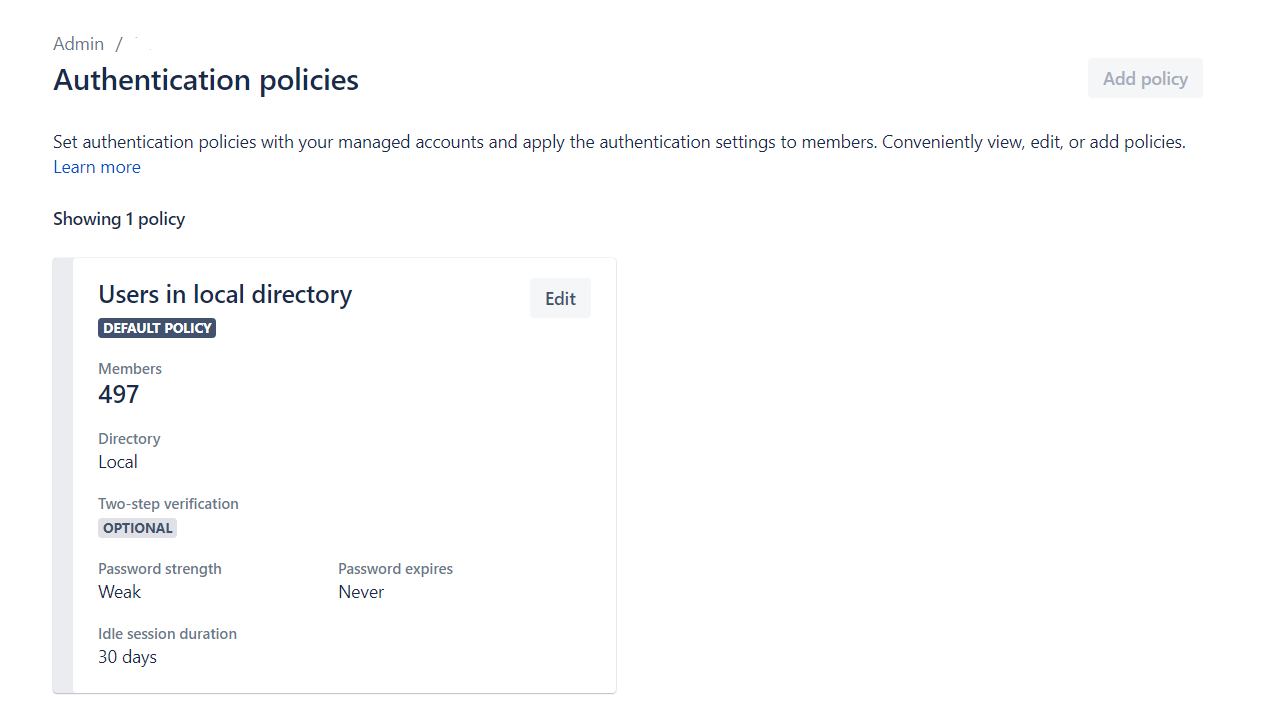
- Select Reset passwords.
- The next time a user logs in, we will ask them to create a new password.
5. Set an authentication policy
Any authentication policy you set up will apply to any Atlassian Cloud product:
- Bitbucket.
- Confluence.
- Jira Work Management.
- Jira Software.
- Jira Service Management (only for Atlassian account users with verified domains). Authentication policies cannot be created for customer users of a Jira Service Management portal.
- These customer accounts will have only one password requirement: when created, they must be between 8 and 100 characters in length. You can learn more about portal-only accounts.
Please also note that:
- We can ask users to use two-step verification when logging in, or keep it as an option.
- We can set how long we keep the user session alive, for security we can make it so that a user has to log in at least every 15 minutes and at most 30 days.
We will cover these two topics in depth in future articles.In the meantime, we hope you have found this information useful.
Sam García January 17th, 2023